|
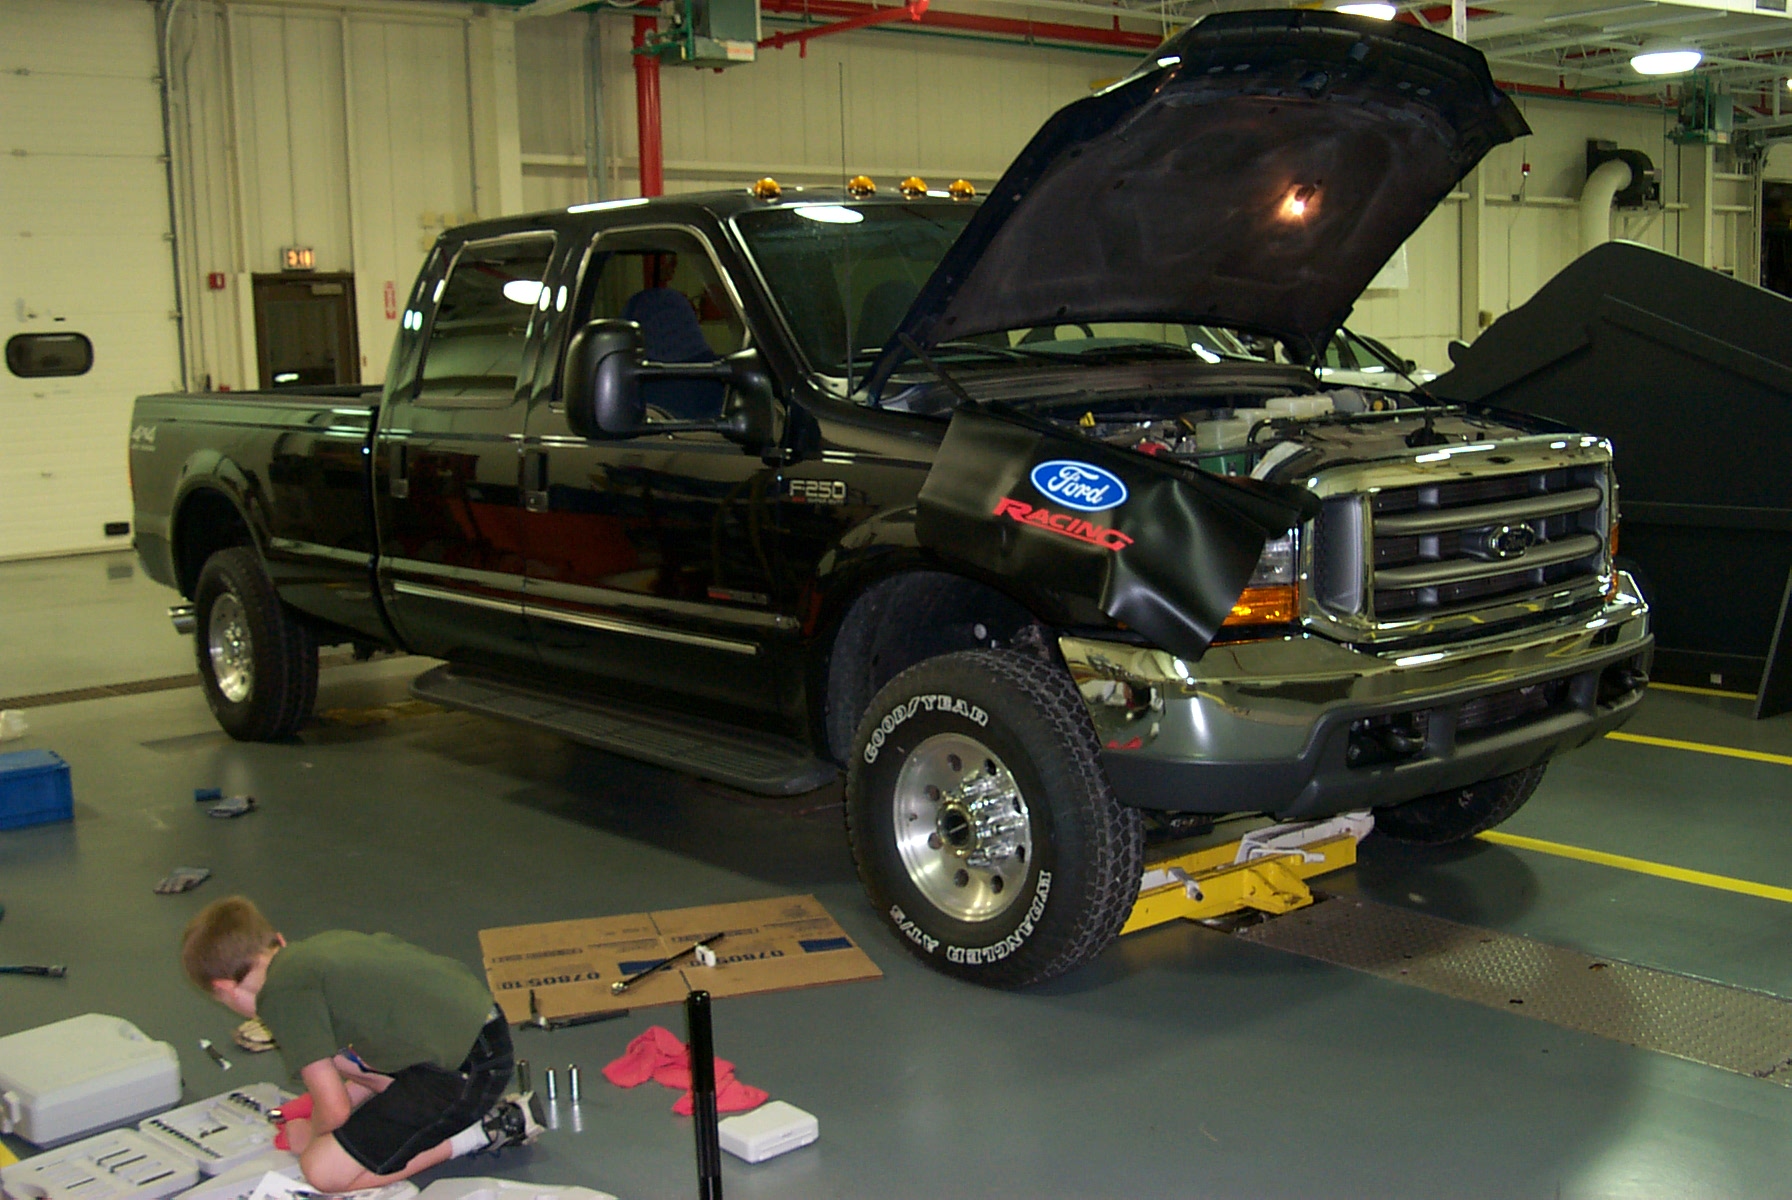
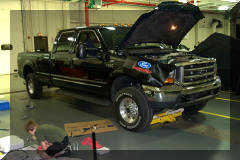
My truck is a 2000 Ford, F250, Superduty, Crew Cab,
4x4, Automatic, 3.73LS Rear End, full length bed, with the Powerstroke 7.3L
diesel.
The truck is 1 year and 10 months old, with 27,500
miles on it in these pictures.
The exhaust system is from
Western Diesel, is made of 439
Stainless Steel and includes the following:
 |
31/2" down pipe |
|
4" 3-piece intermediate pipe |
|
4" straight through muffler and tail pipe |
|
5" polished tip with the Western Diesel logo
etched into it |
|
4 nickel plated clamps |
$1150 alone, or $2475 as a part of their Pro Shot kit. The Pro Shot
kit is what I purchased and includes the following:
| Exhaust system described above |
| 3-Position Chip |
| Gages and Pillar Mount - EGT, Boost & Transmission Temperature -
with all required hardware |
| Turbo Ram Air |
I purchased my kit from Diesel
Injection Service. They have free shipping through August (the
exhaust alone weighs 84lbs) and went out of their way to quickly get my
items to me.
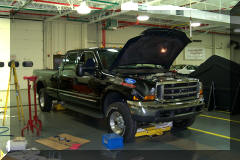
It took my son (Jean-Luc, age 9) and me 4-5 hours
to do the complete installation - It took this long even with the a lift.
A significant amount of this time was spent in trying to get the old exhaust
off without damaging it. I wanted to be able to go back to stock.
After an hour or two, we gave up and cut it in two places.
I am pleased with the quality, construction and
completeness of the system/kit. It gave my truck a noticeable rumble -
sort of like a muscle car. I'm not sure I like the rumble, but my wife
does (she has an Olds 442). It definitely improved the turbo spool up
time and I believe I can feel an improvement in horsepower, in the seat of
my pants. My primary reason for installing the exhaust was to help
lower the EGT when I install my chip - they are shipping later this week
(8/6/01).
Western
Diesel claims the following performance with the complete kit (these are
rear wheel measurements):
| |
HP |
Torque |
|
| Stock |
198 |
433 |
|
| Economy Mode |
253 |
542 |
3-4mpg Improvement |
| Tow Mode |
271 |
586 |
|
| High Output Mode |
354 |
774 |
Street/Emissions Legal |
|
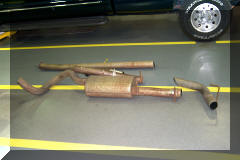
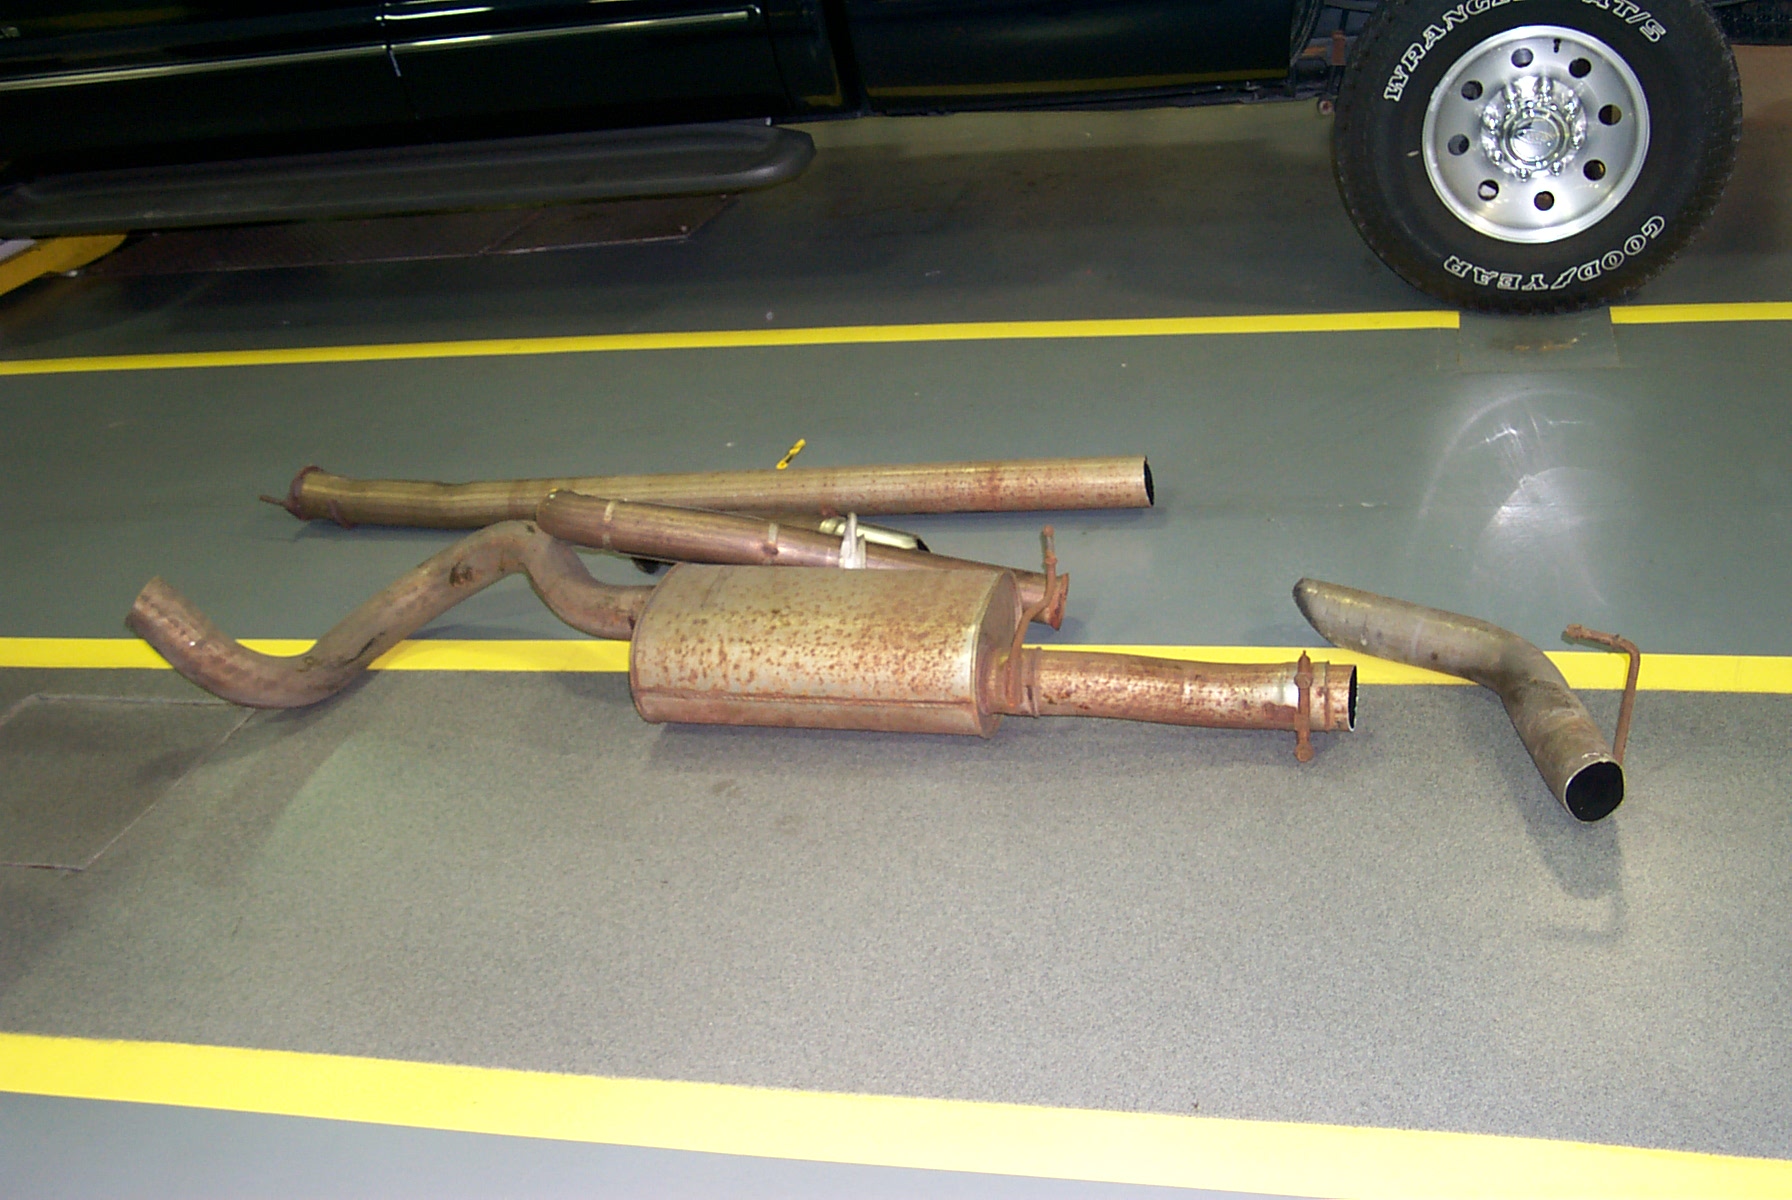
Here's the original - cut at the bend in the down pipe and the intermediate
pipe (they would not separate). Even though the OEM Exhaust may look
bad, it should remain solid and last at least 5 Years/100,000 Miles. I
used soapy water to help remove the original exhaust hangers from the rubber
pucks. |
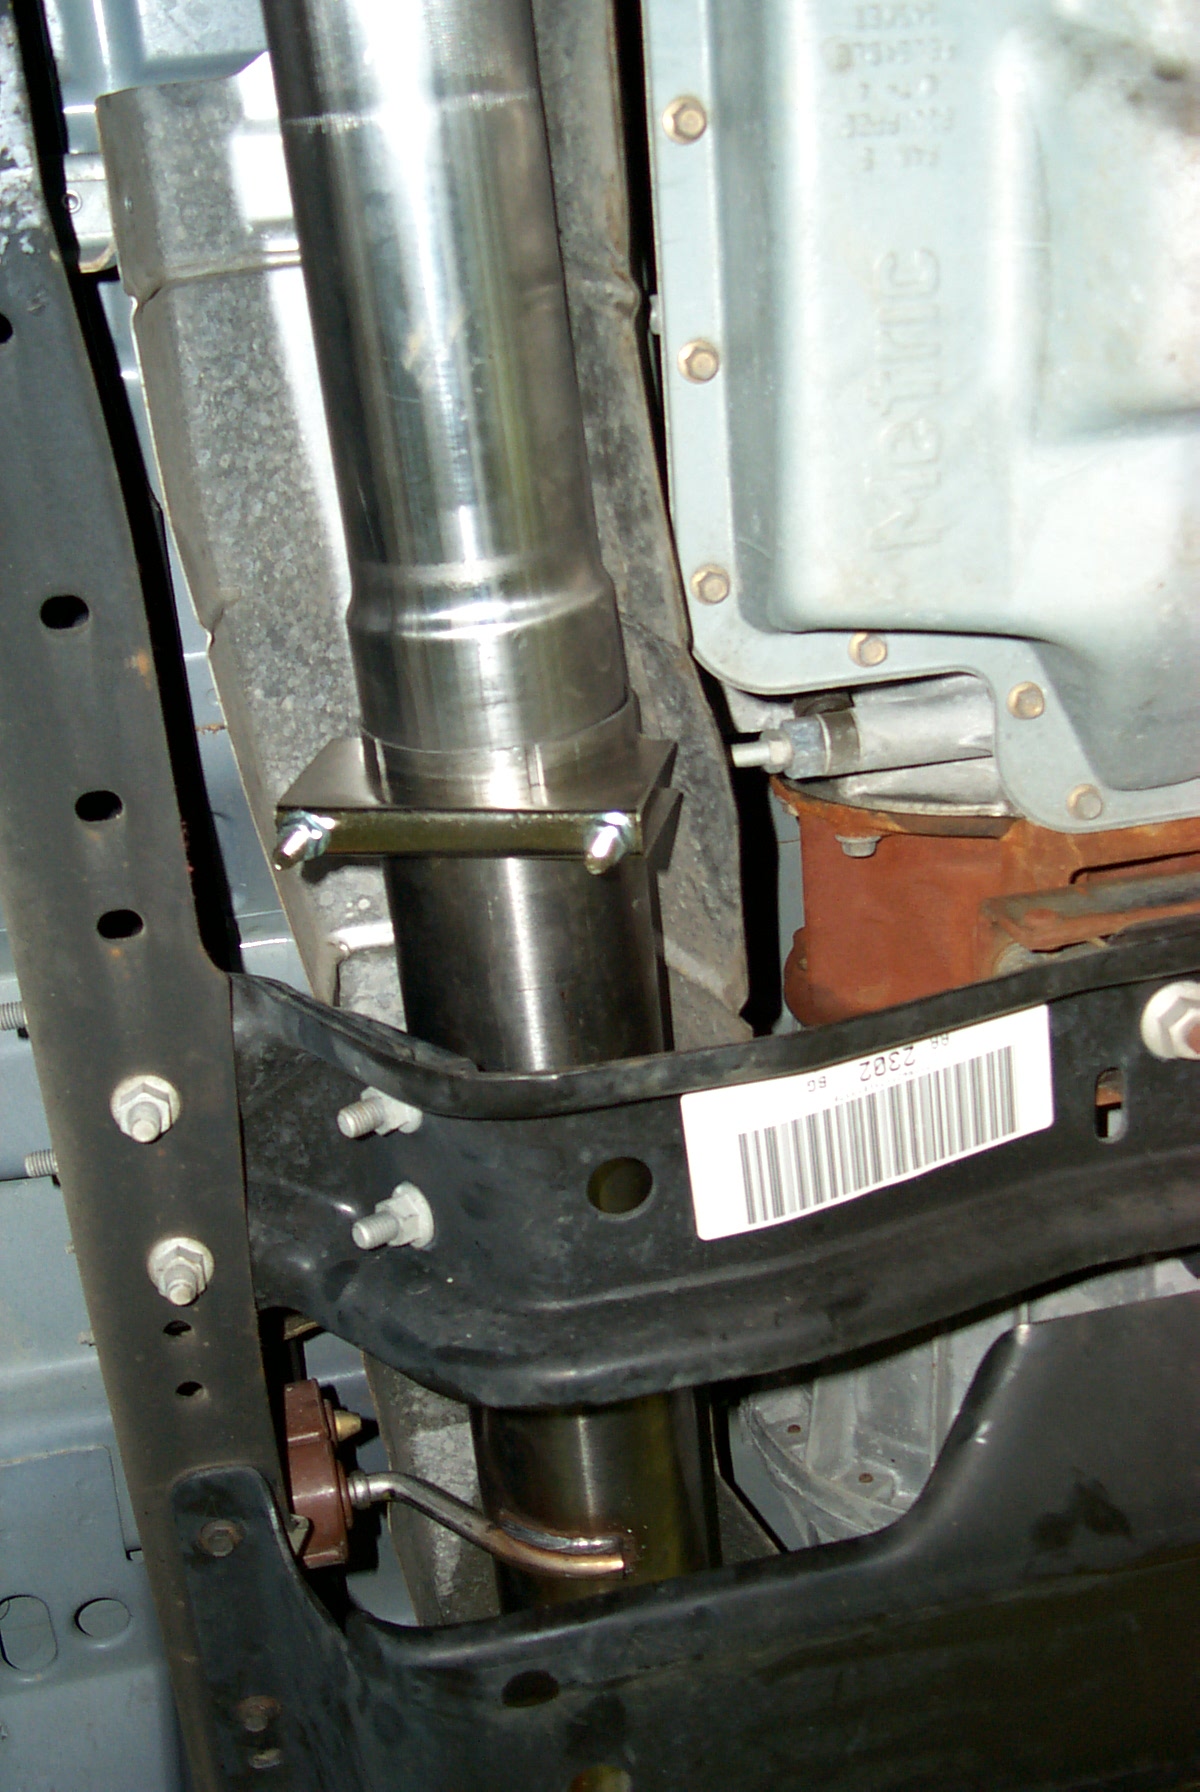
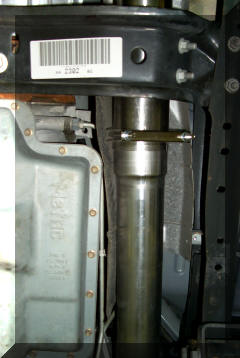
I had trouble getting the new down pipe in with a flush fit. This was the
most difficult part of the installation, requiring several ups and downs
with the lift. To get to the down pipe clamp, you have to reach over
the engine and reach under the dash. The pipe was manufactured fine.
It was just difficult to get the proper alignment/fit above and below the
truck. |
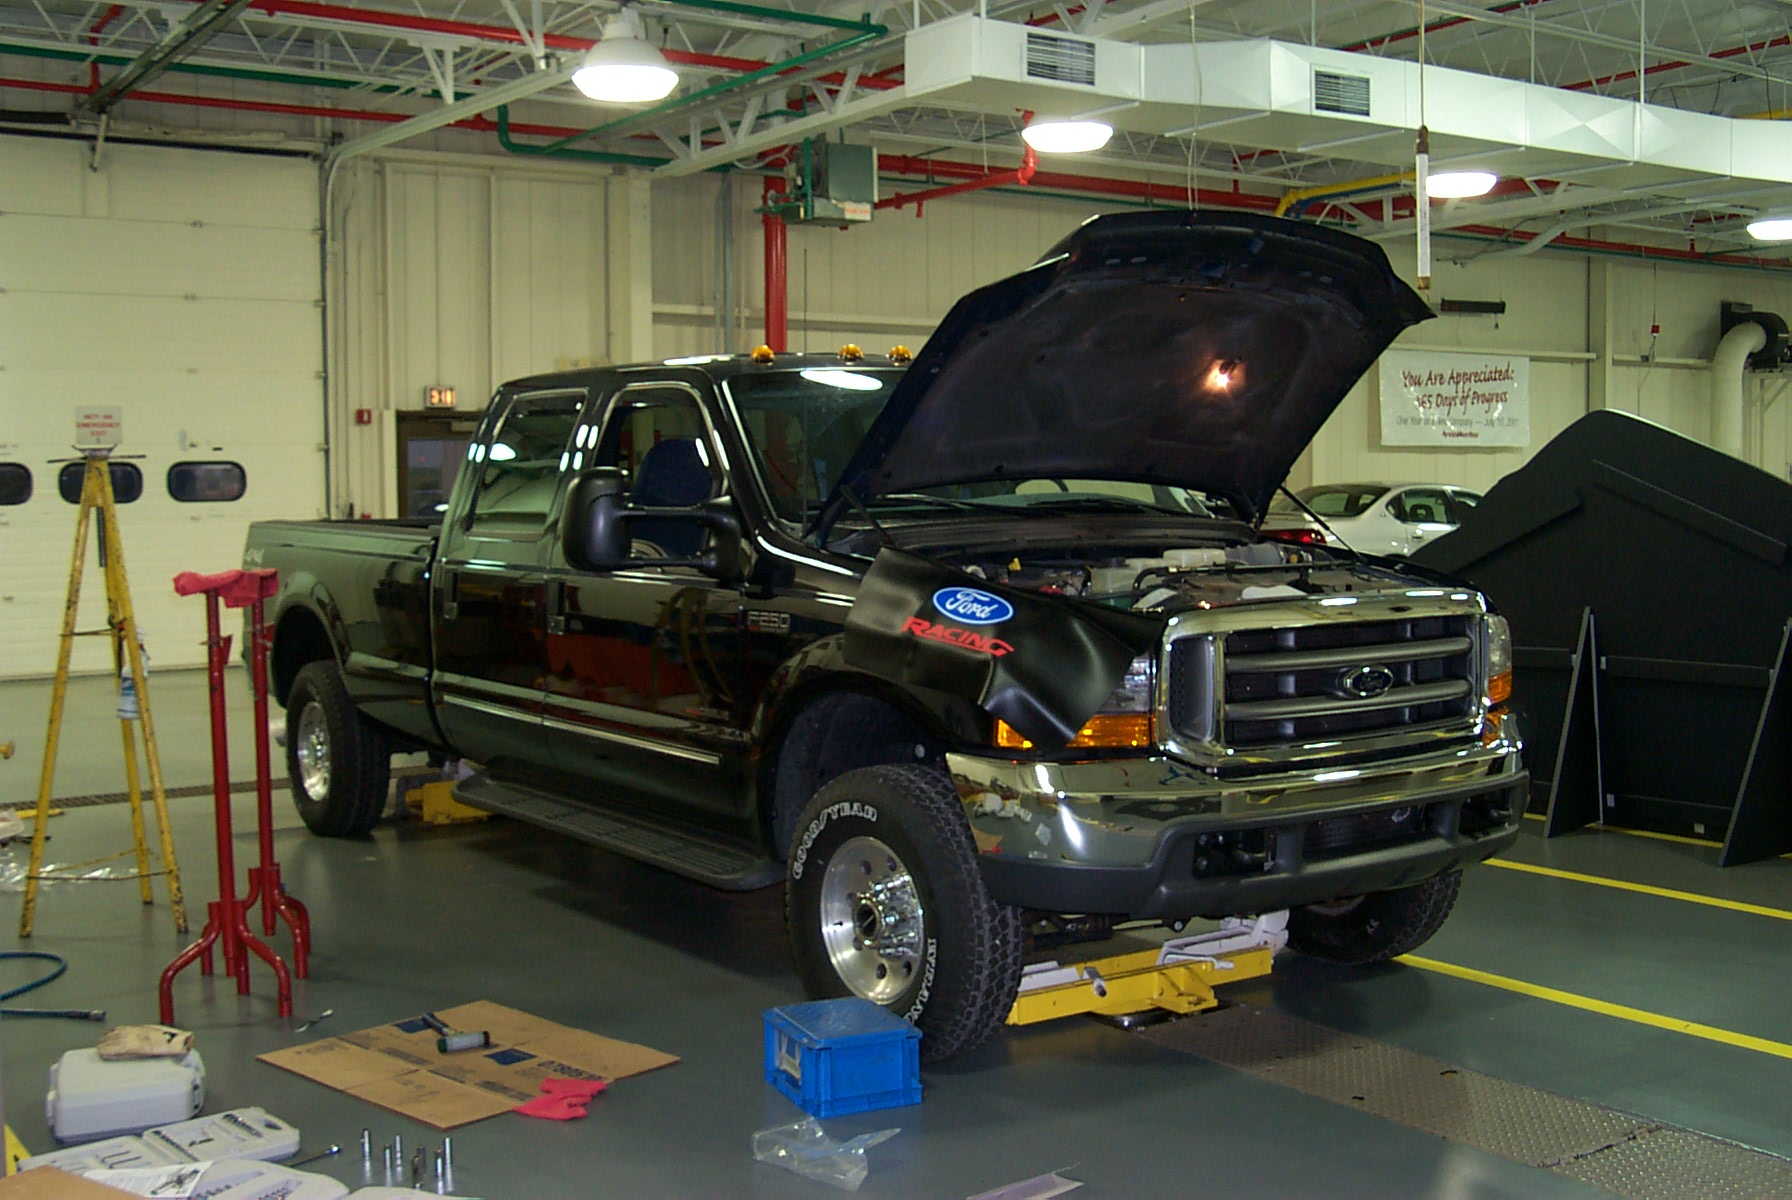
The truck just waiting for me to finish the down pipe installation - it was
time to take a break. Until you've tried to remove and replace a down
pipe on these trucks, you won't appreciate my comment about it being "time
to take a break." |
Just getting ready to adjust rotation on the pipes for neutral hanging and
tighten all the clamps. Again, I used soapy water to lubricate the
rubber pucks for inserting the new exhaust hangers. |
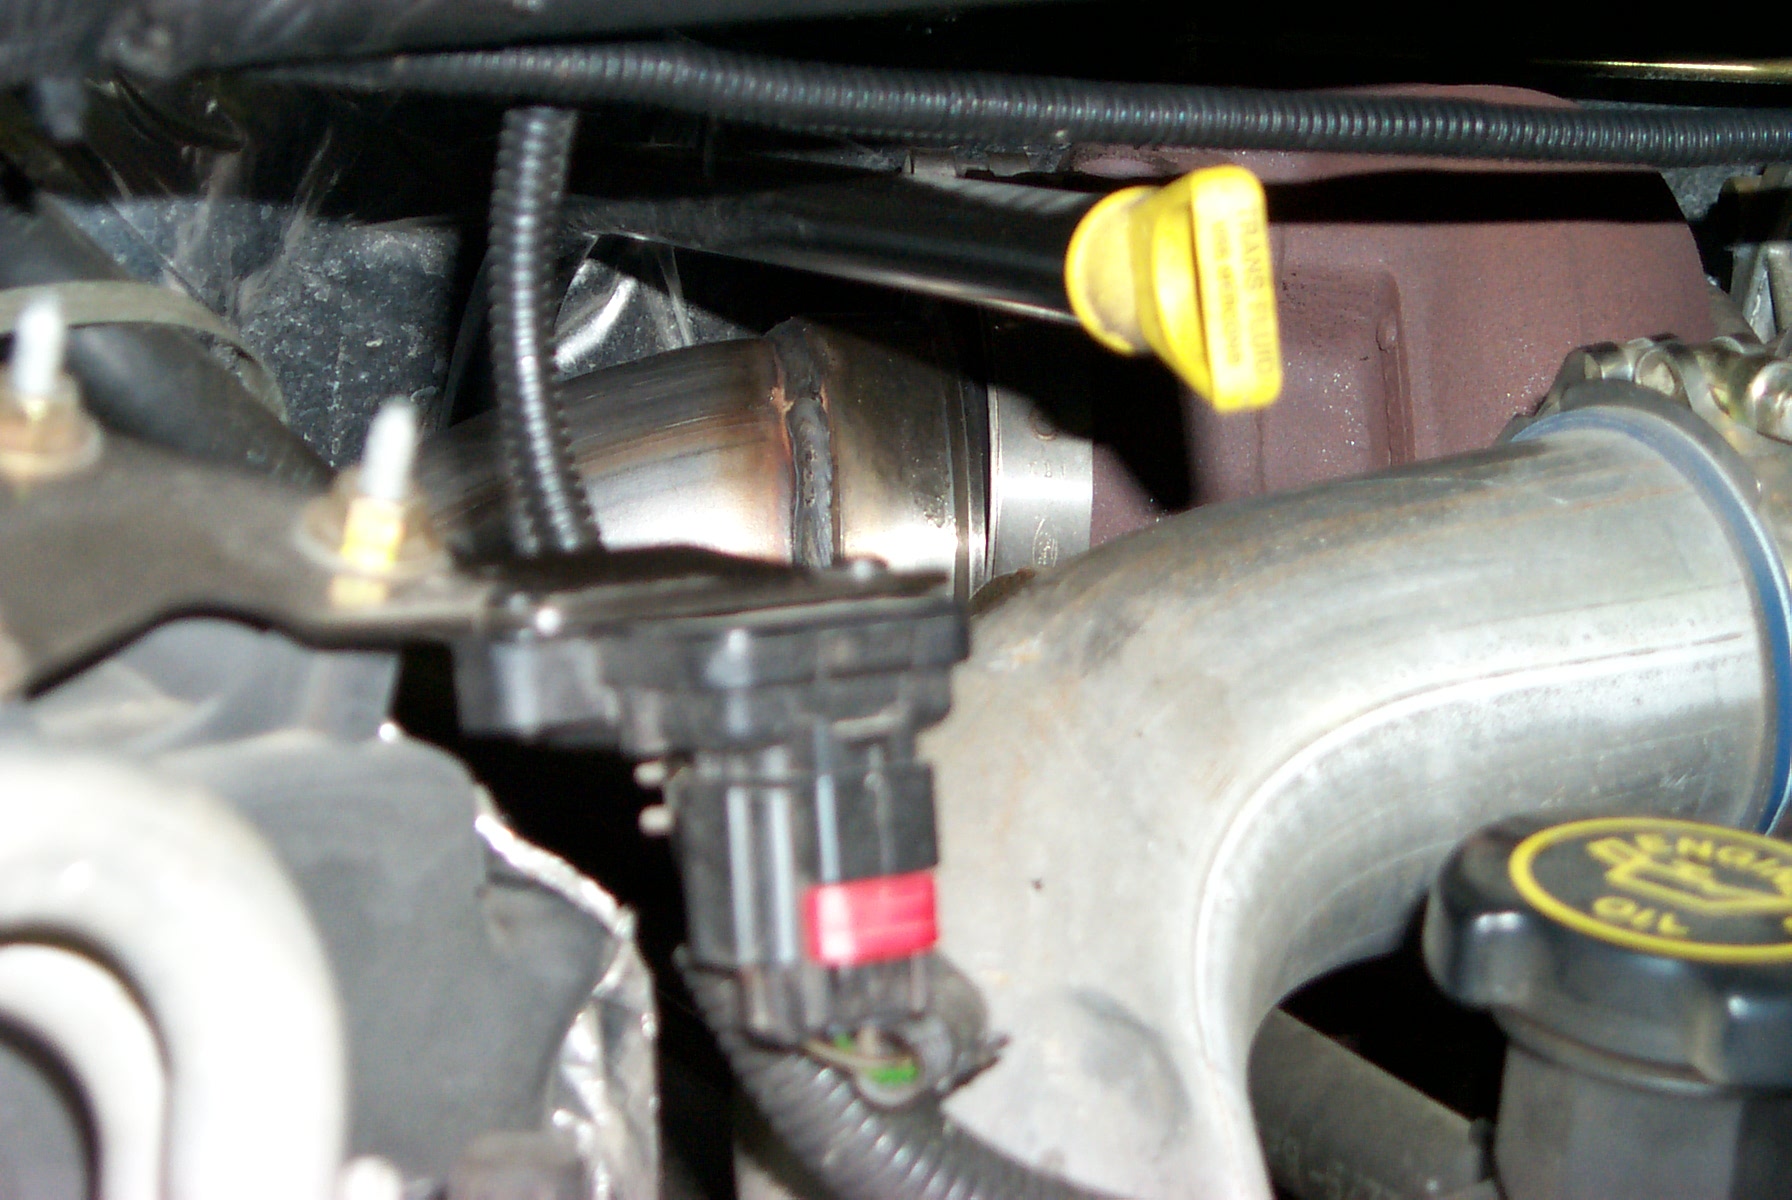
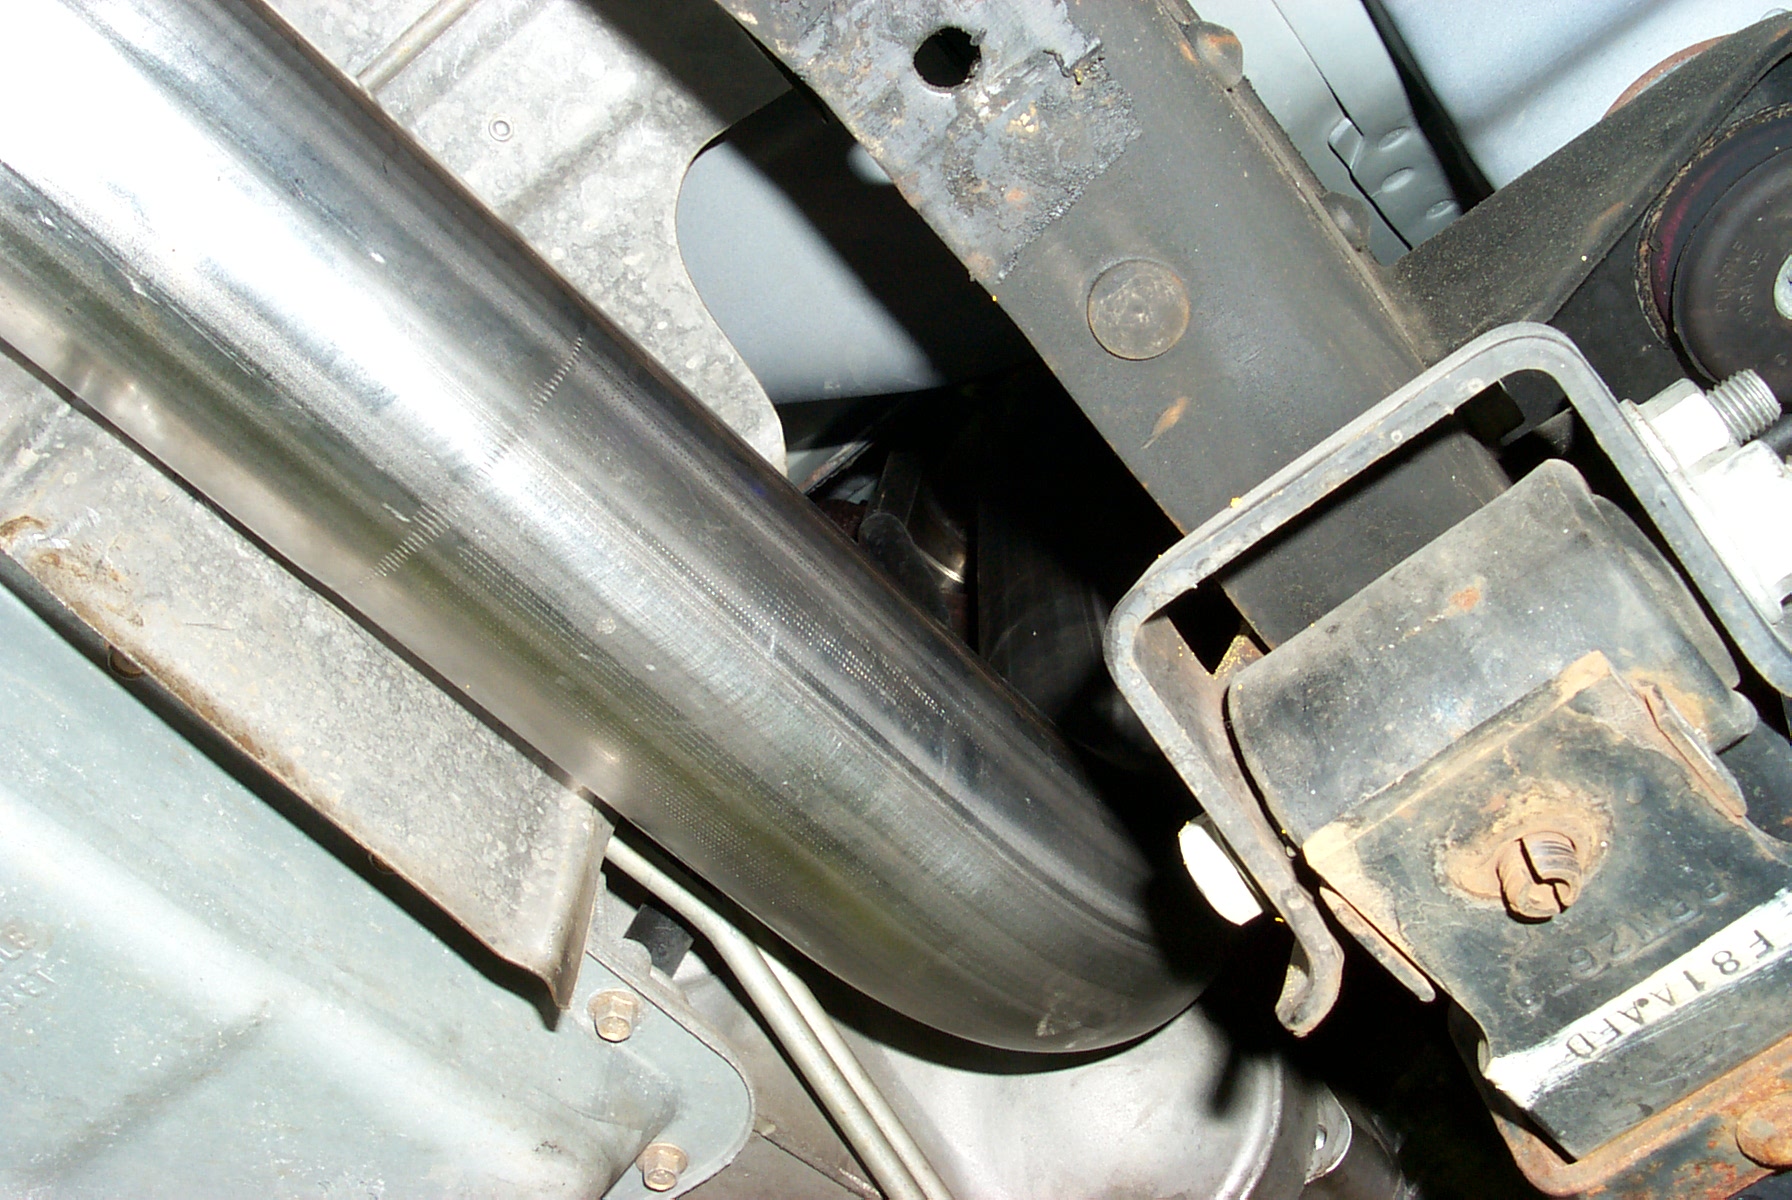
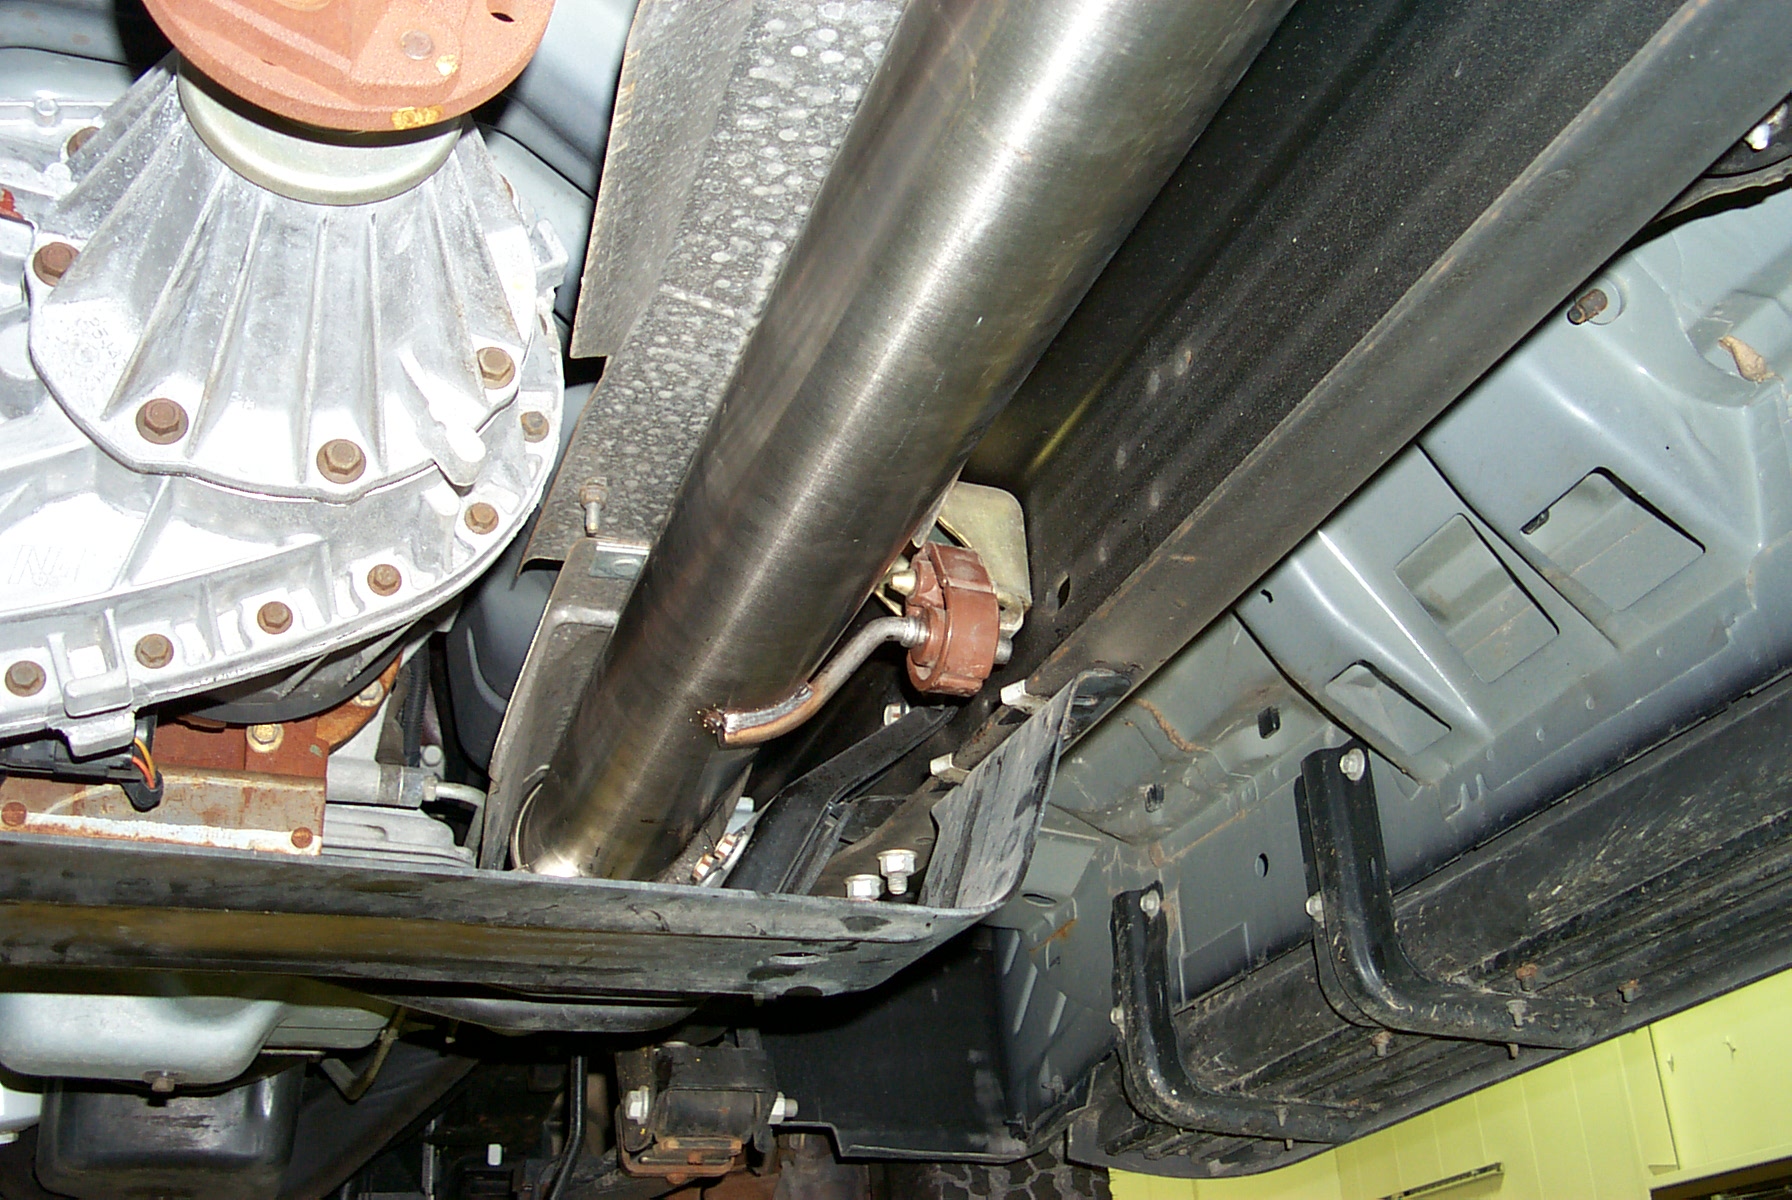
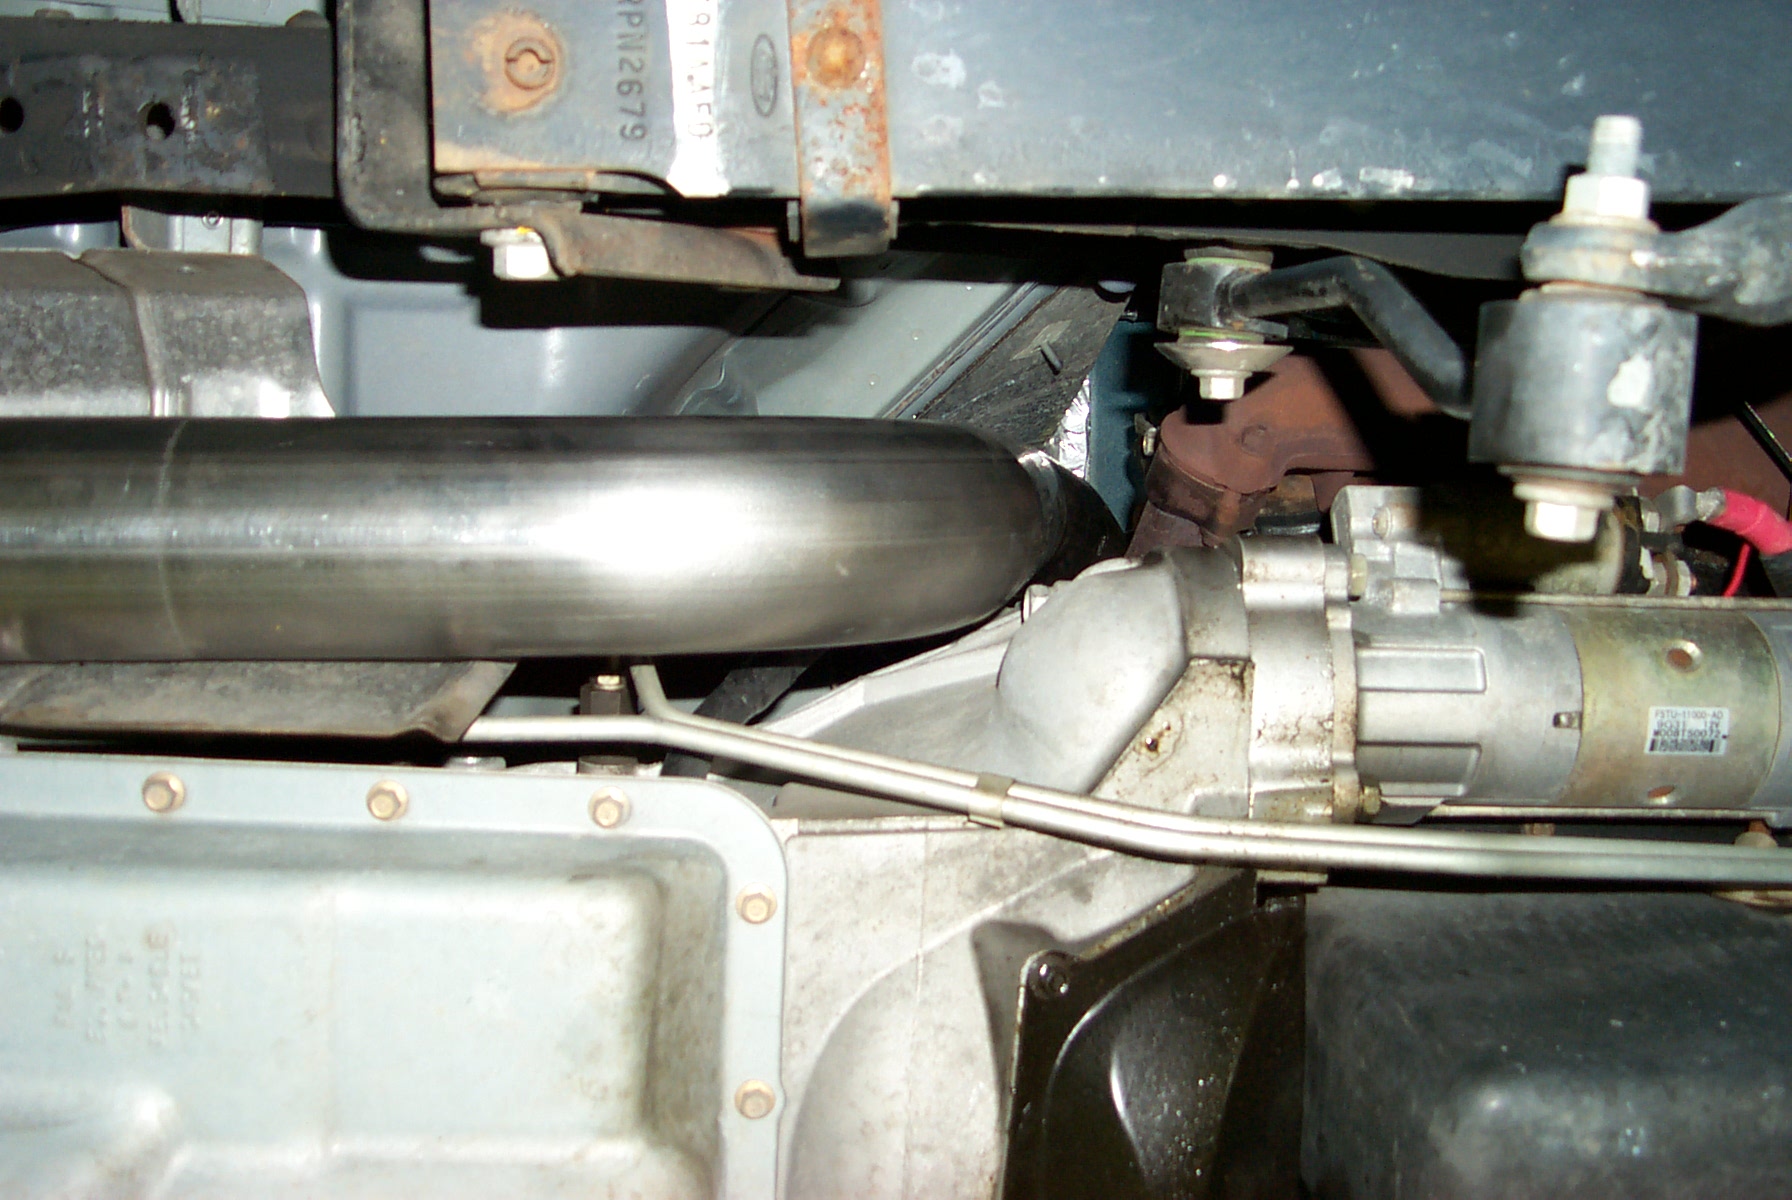
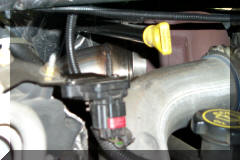
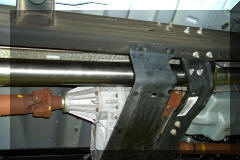
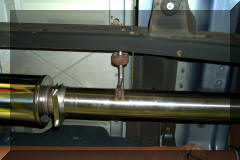
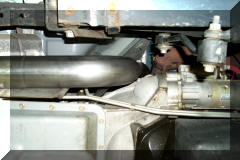
You can barely see the turbo and top of the down pipe. They are just
to the right of the black transmission dipstick tube. |
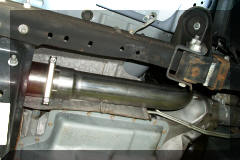
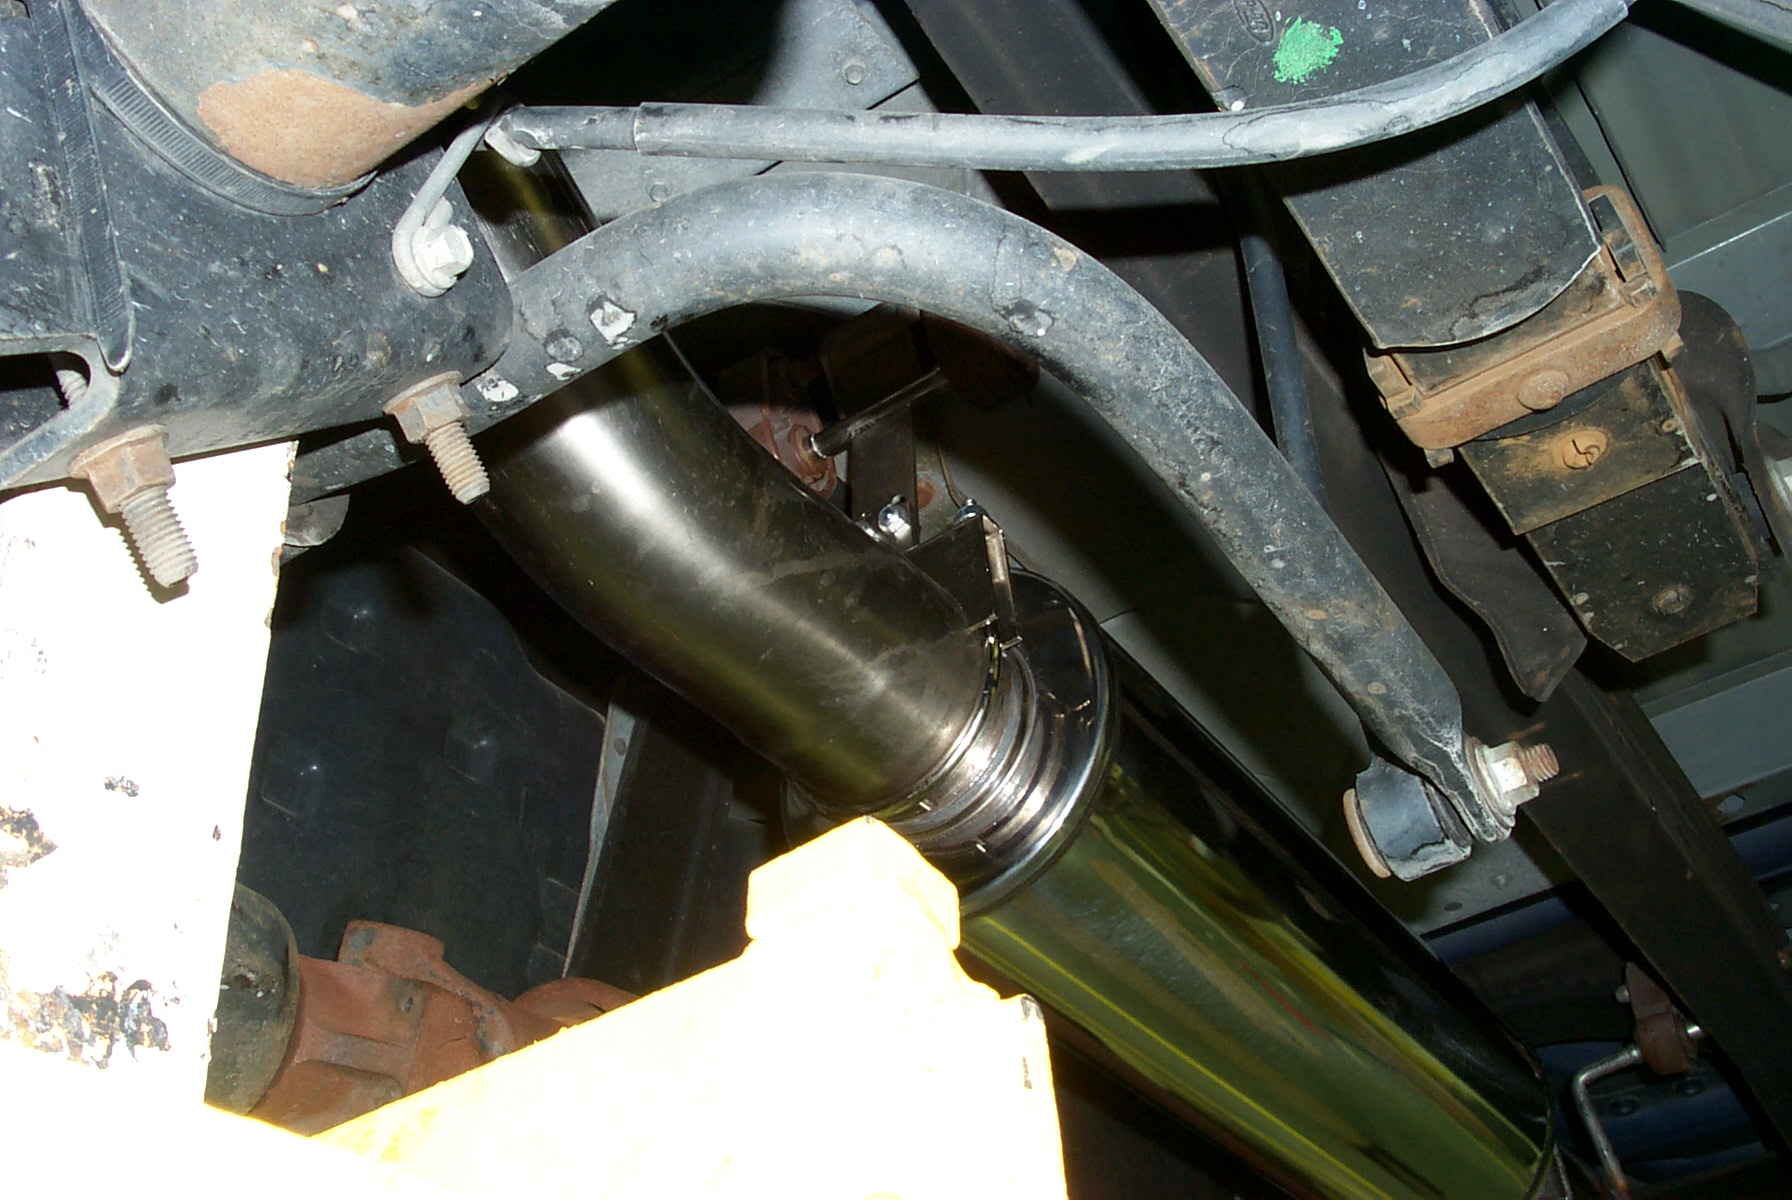
This is the complete down pipe. Notice it stops short of the
transmission support. I have clearance issues with the transmission
housing and between the clamp and the shield. I bent the shield to
split increase clearance. I need to get the down pipe further in the
first intermediate pipe for better transmission housing clearance. |
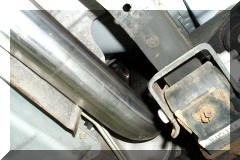
This shows the tight fit between the clamp and the shield on the left.
I bent the shield to split the difference (3/4" each
side) between the clamp and the line on the side of the transmission. |
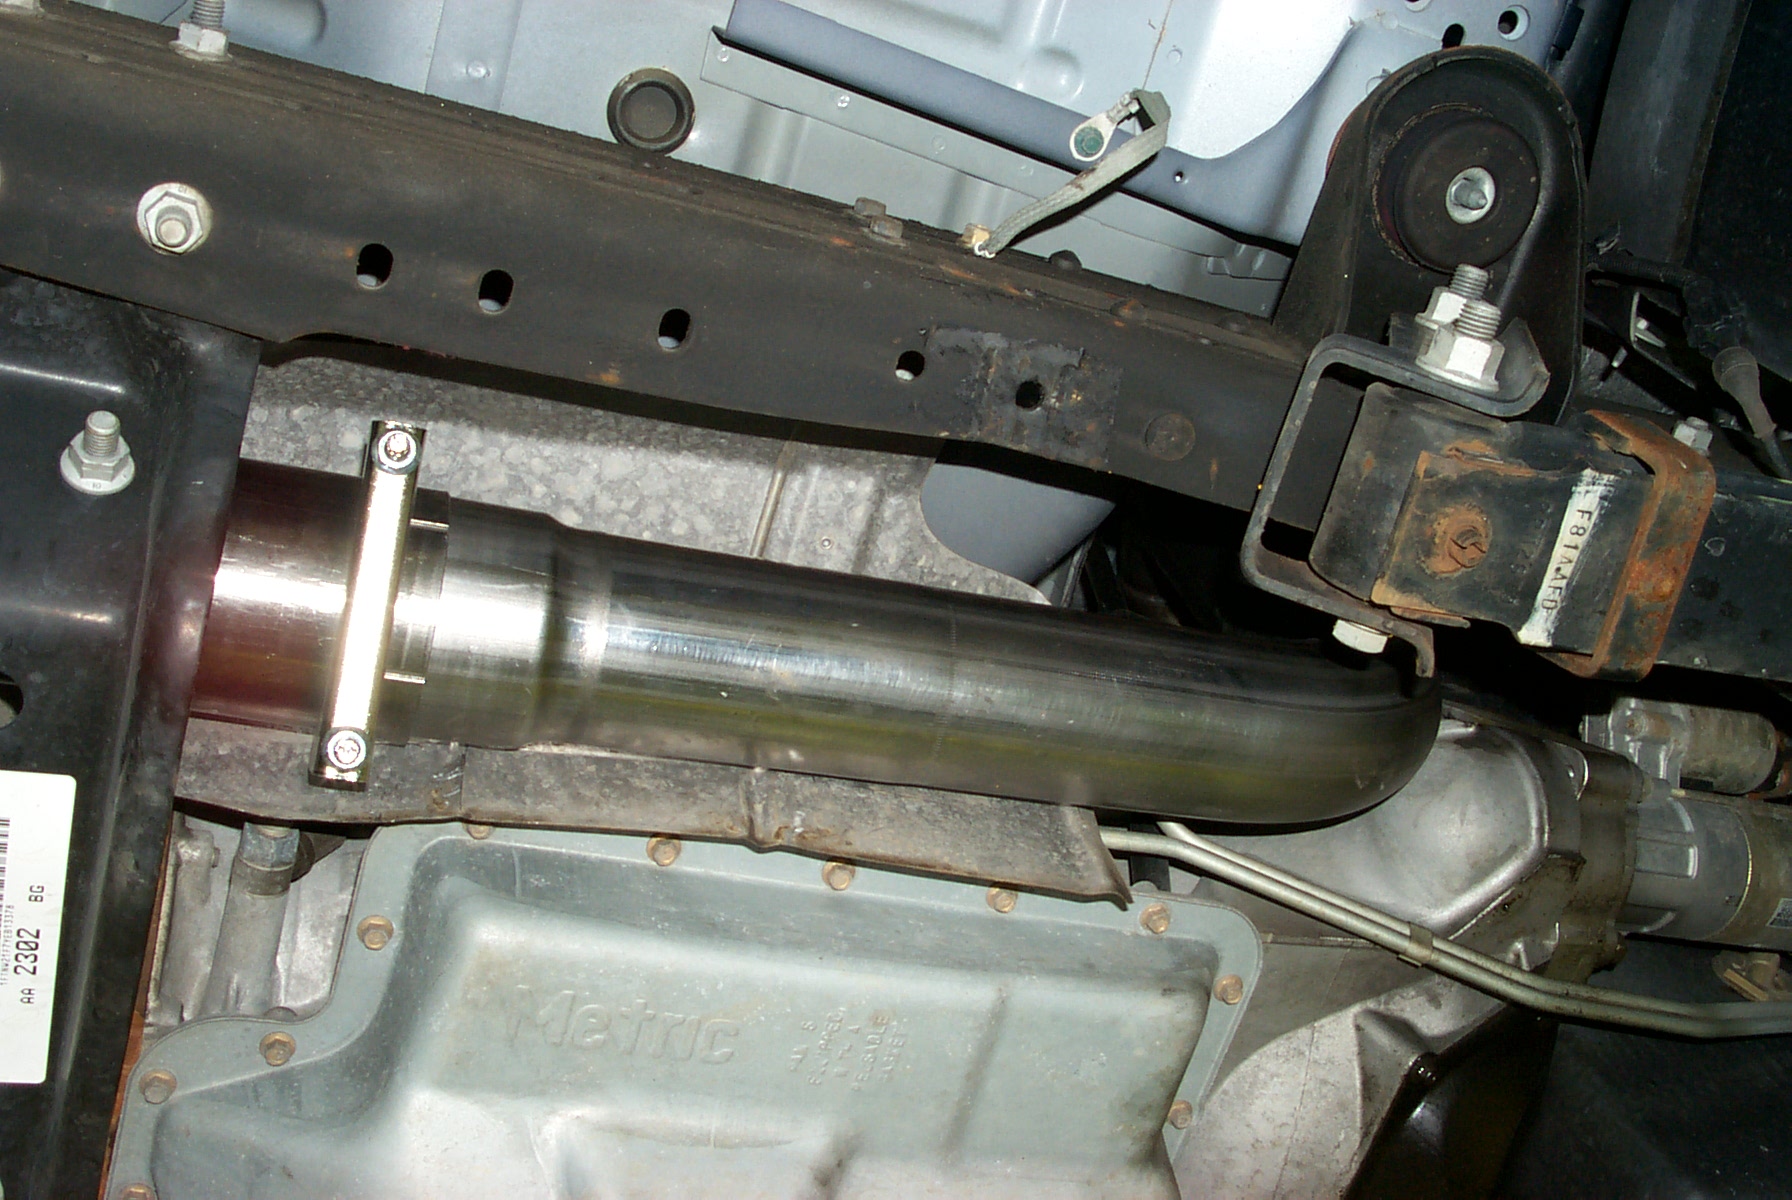
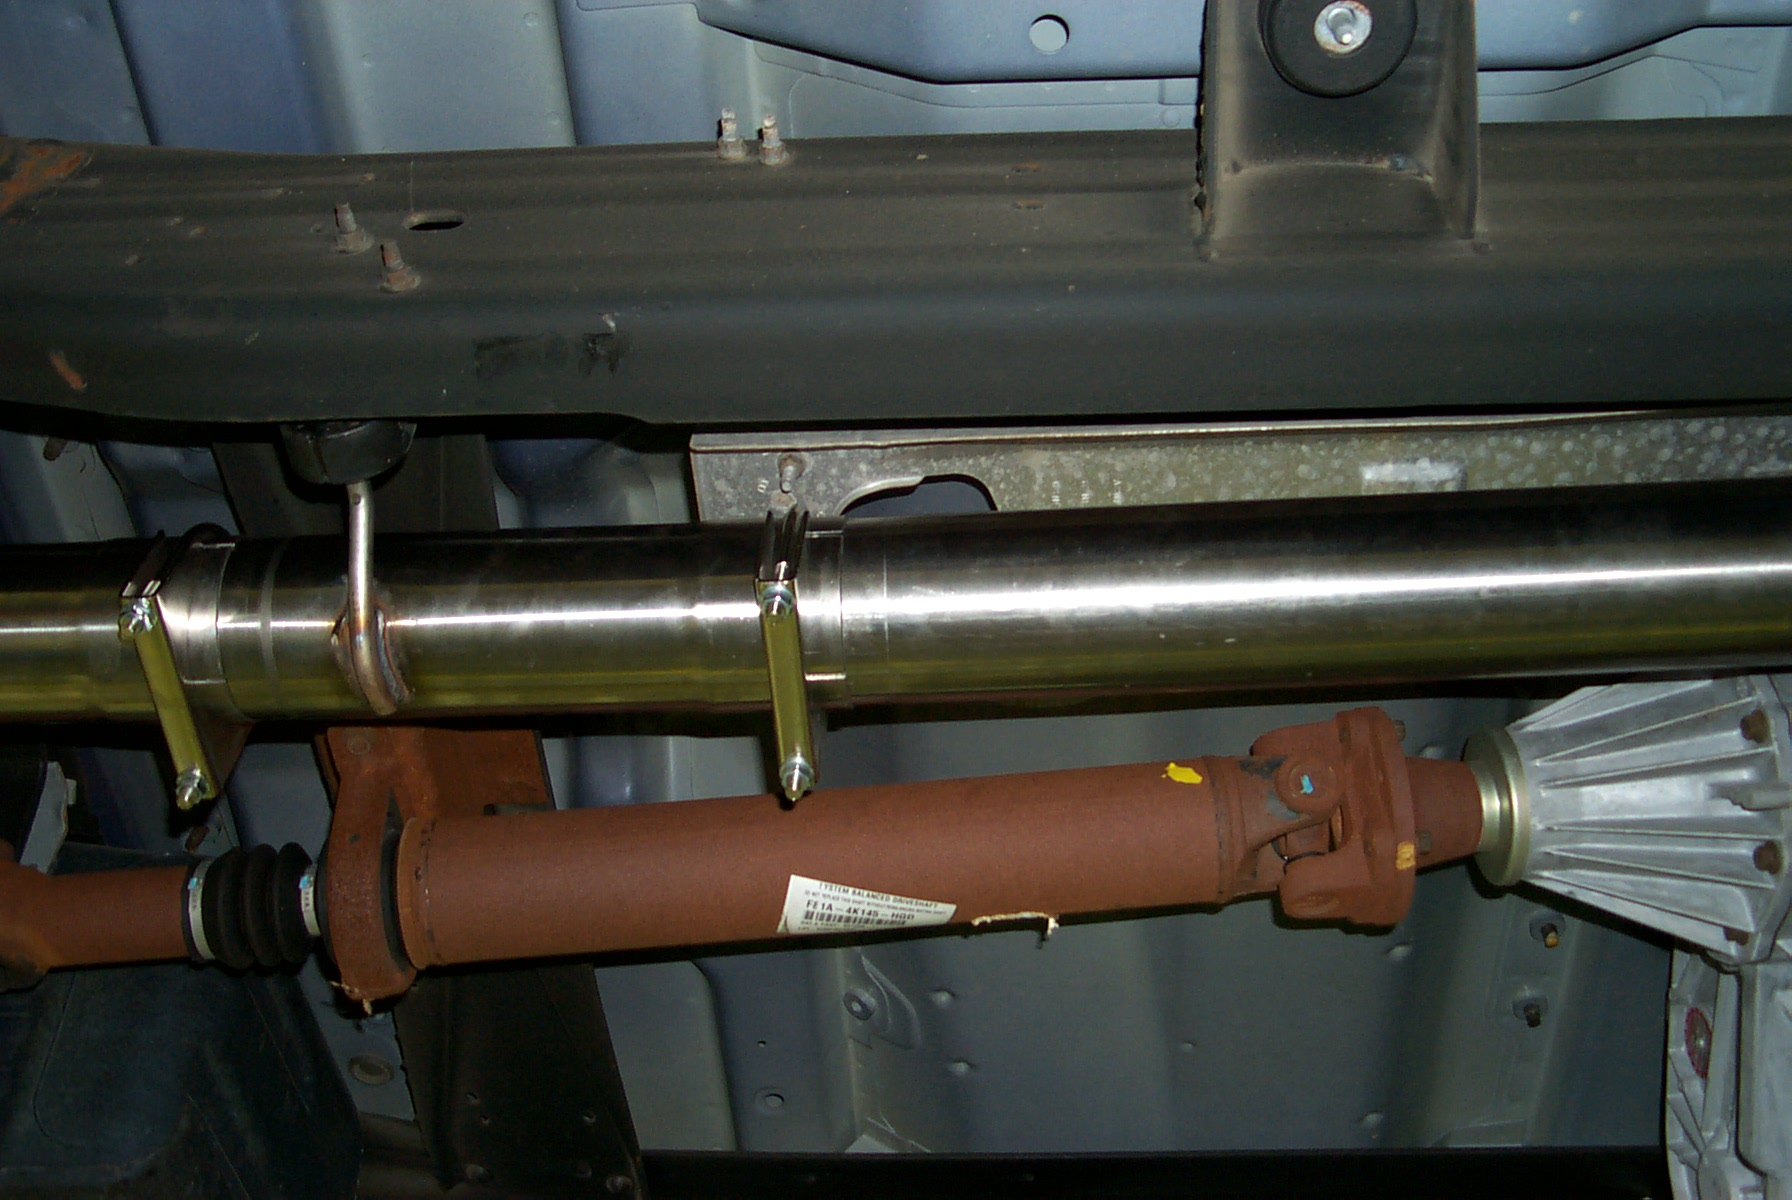
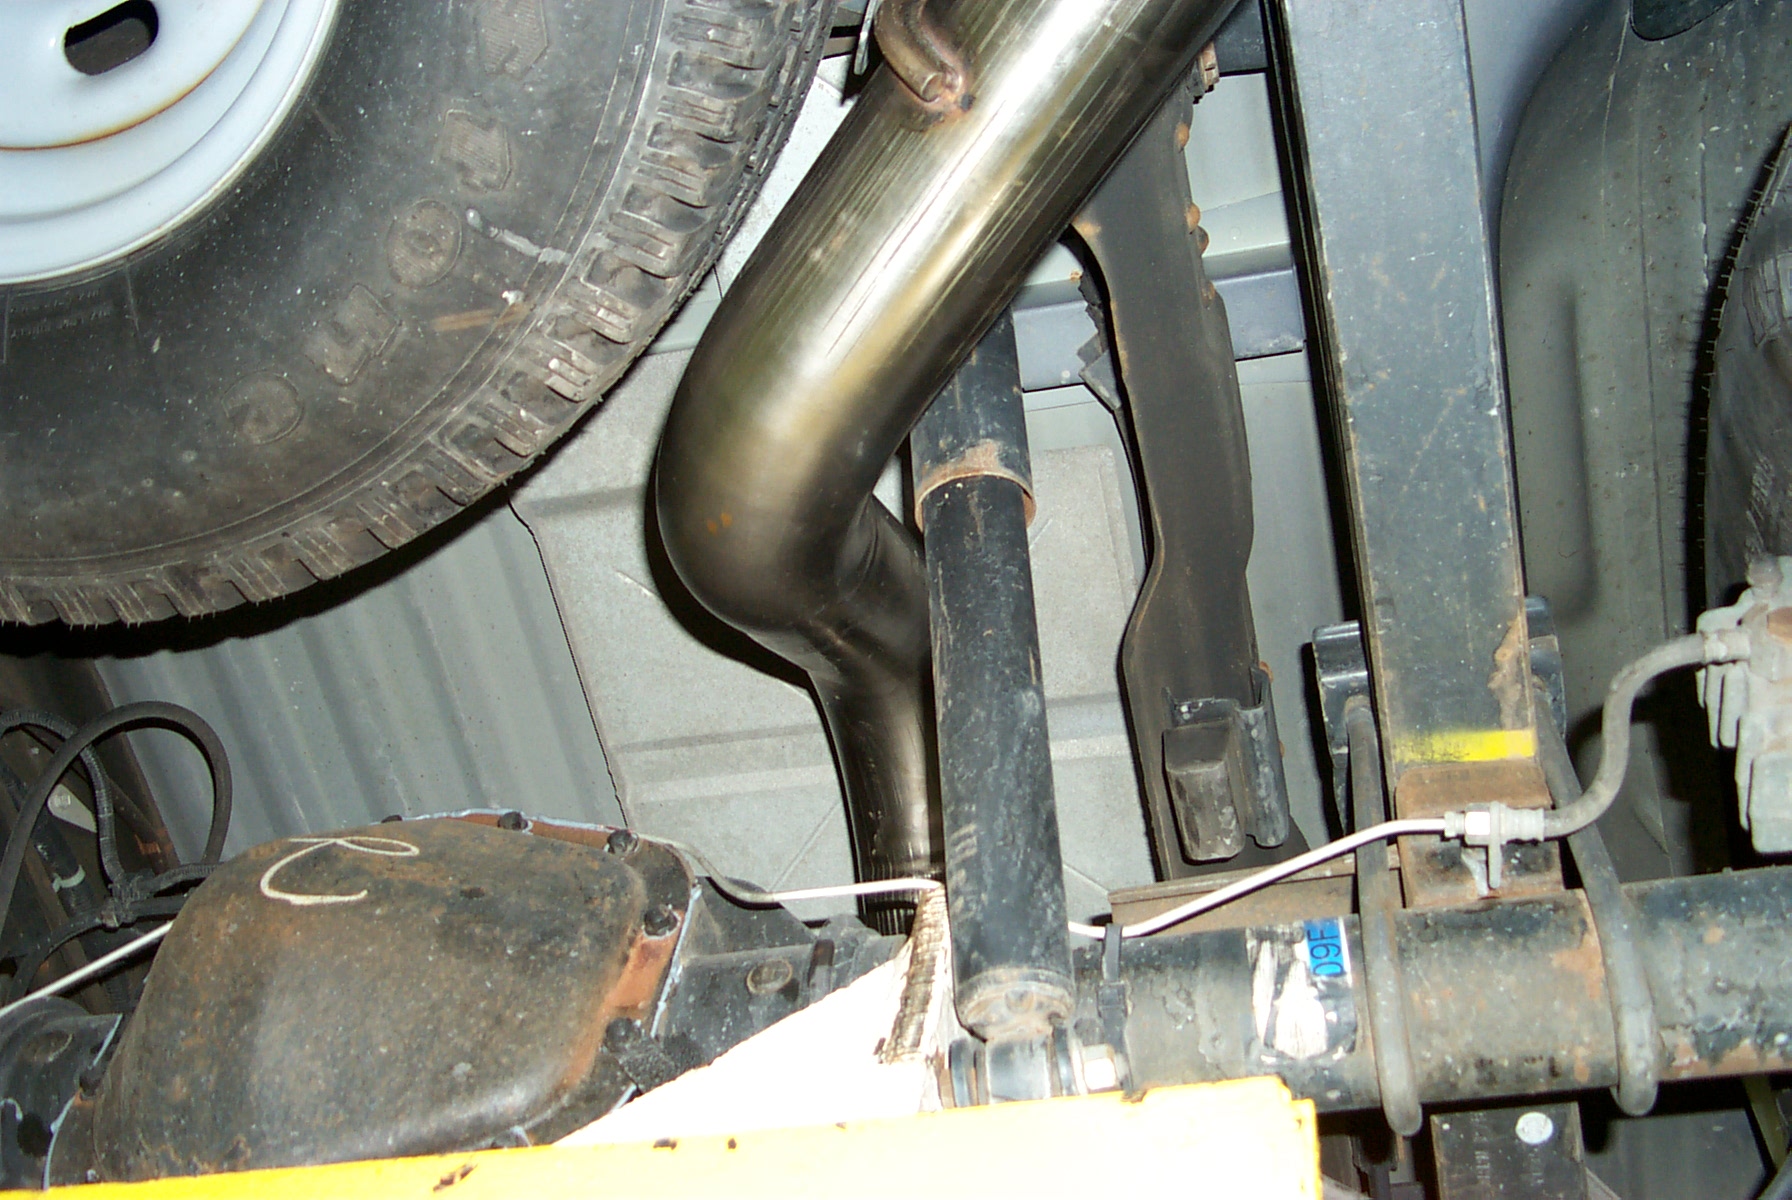
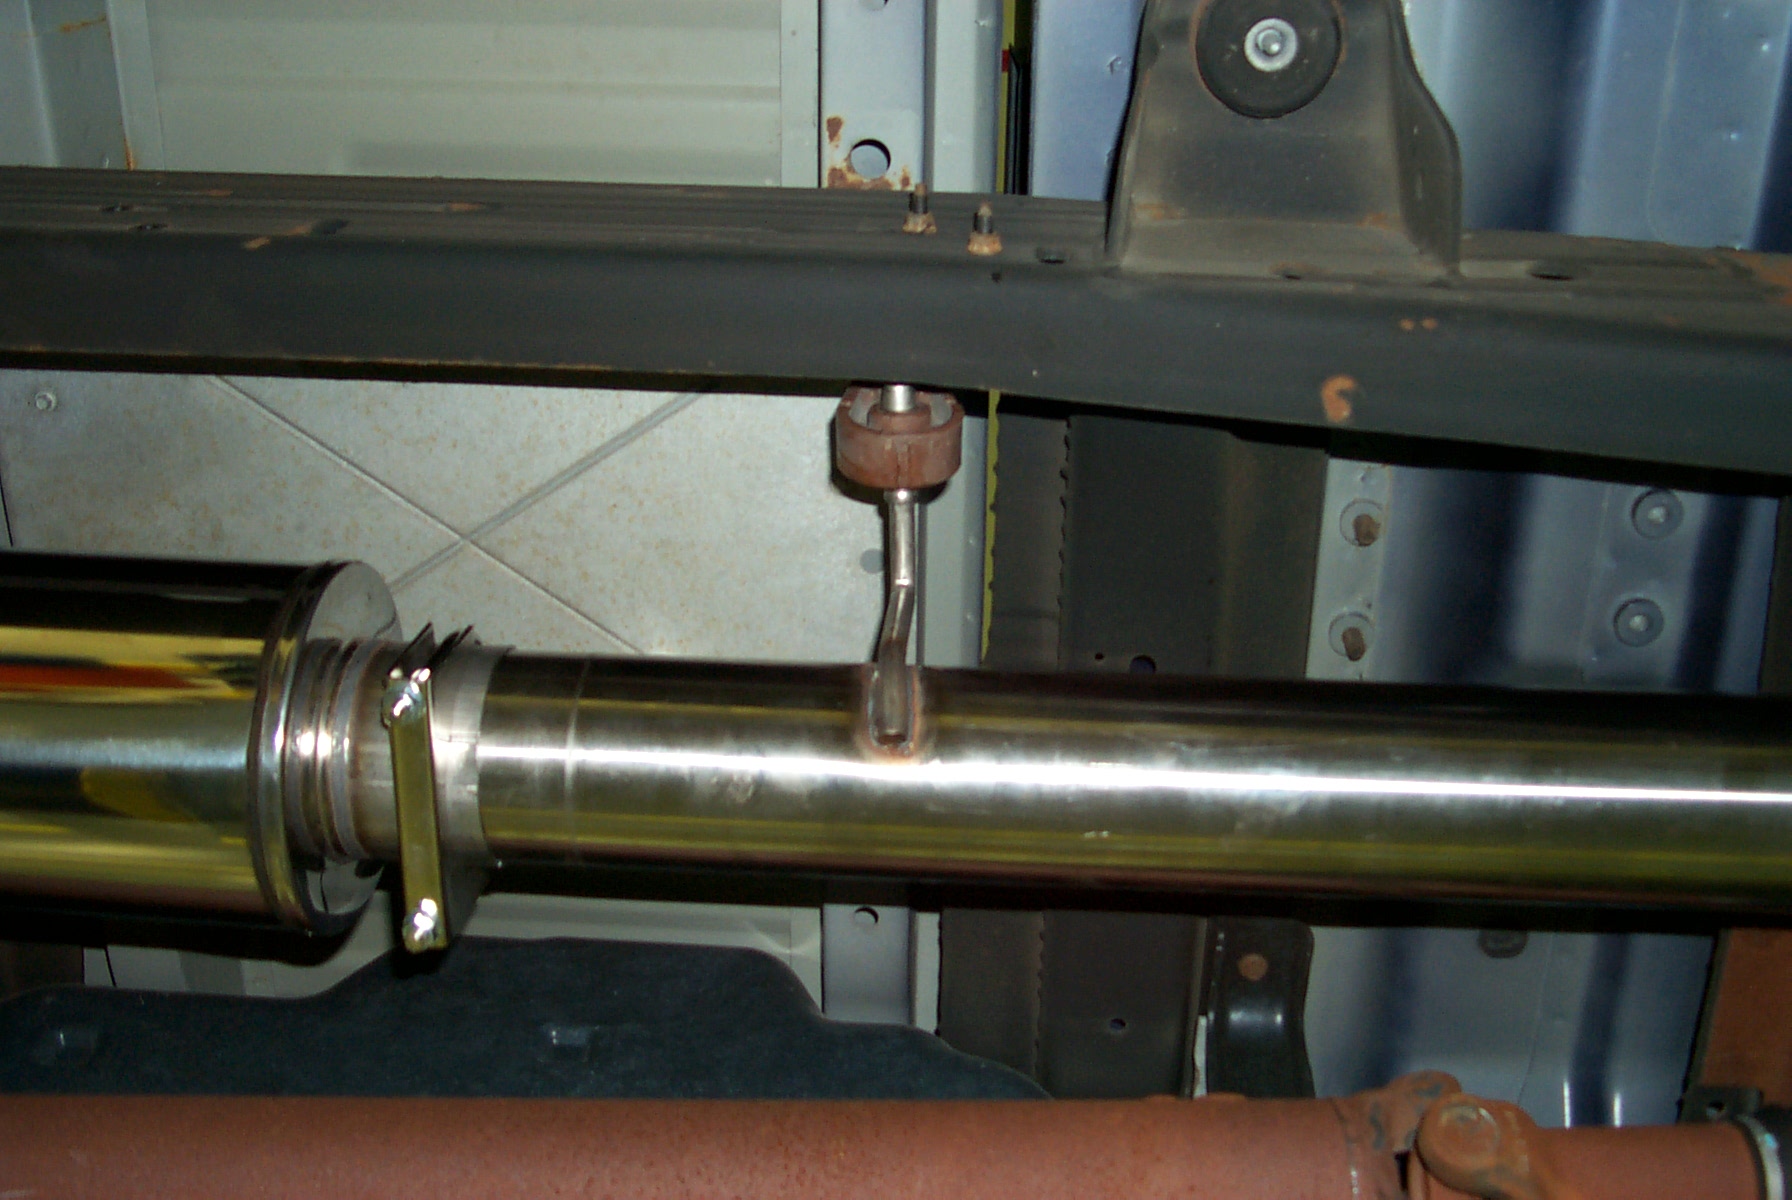
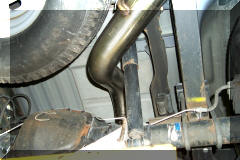
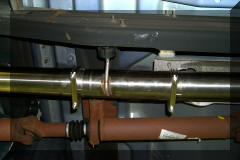
This shows most of the first and longest intermediate pipes (there are
three). The original exhaust had flanges and bolted together above the
transmission skid plate. I cut the original down pipe at the bend so I
would not have to remove the transmission support and support the weight of
the transmission. The replacement pipes are designed to be installed
without removing the transmission support. |
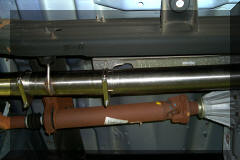
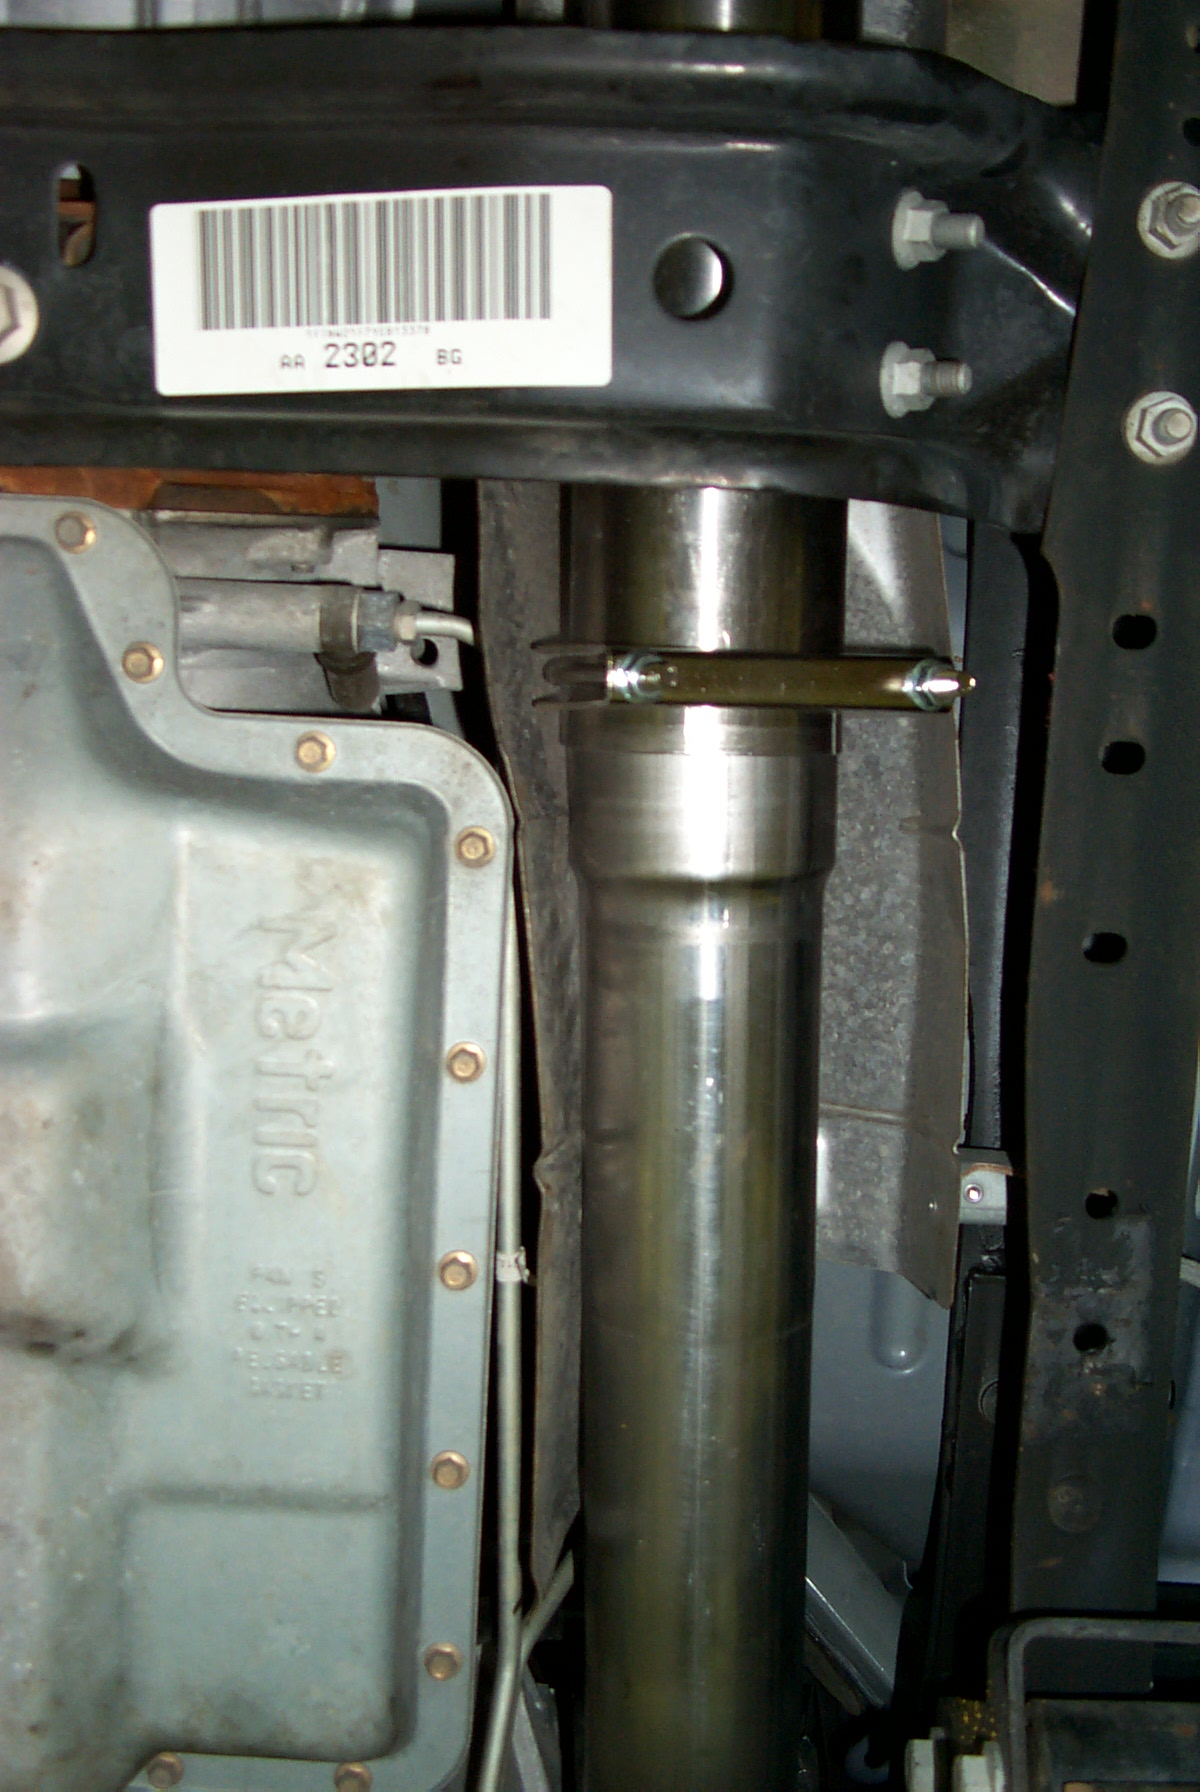
This is the second (and shortest) intermediate pipe. The installation
instructions showed this pipe as the last intermediate pipe. The
hanger on it did not allow this. The frame is higher in the rear, in
front of the muffler/resonator. The hanger is too short to reach the
rubber puck. I had originally installed it where the instructions
indicated and the pipe was way to high. Notice how the hanger is
fairly vertical and level. This takes some patience and rotation of
all the pipes to get the system to hang as "neutral" as possible. |

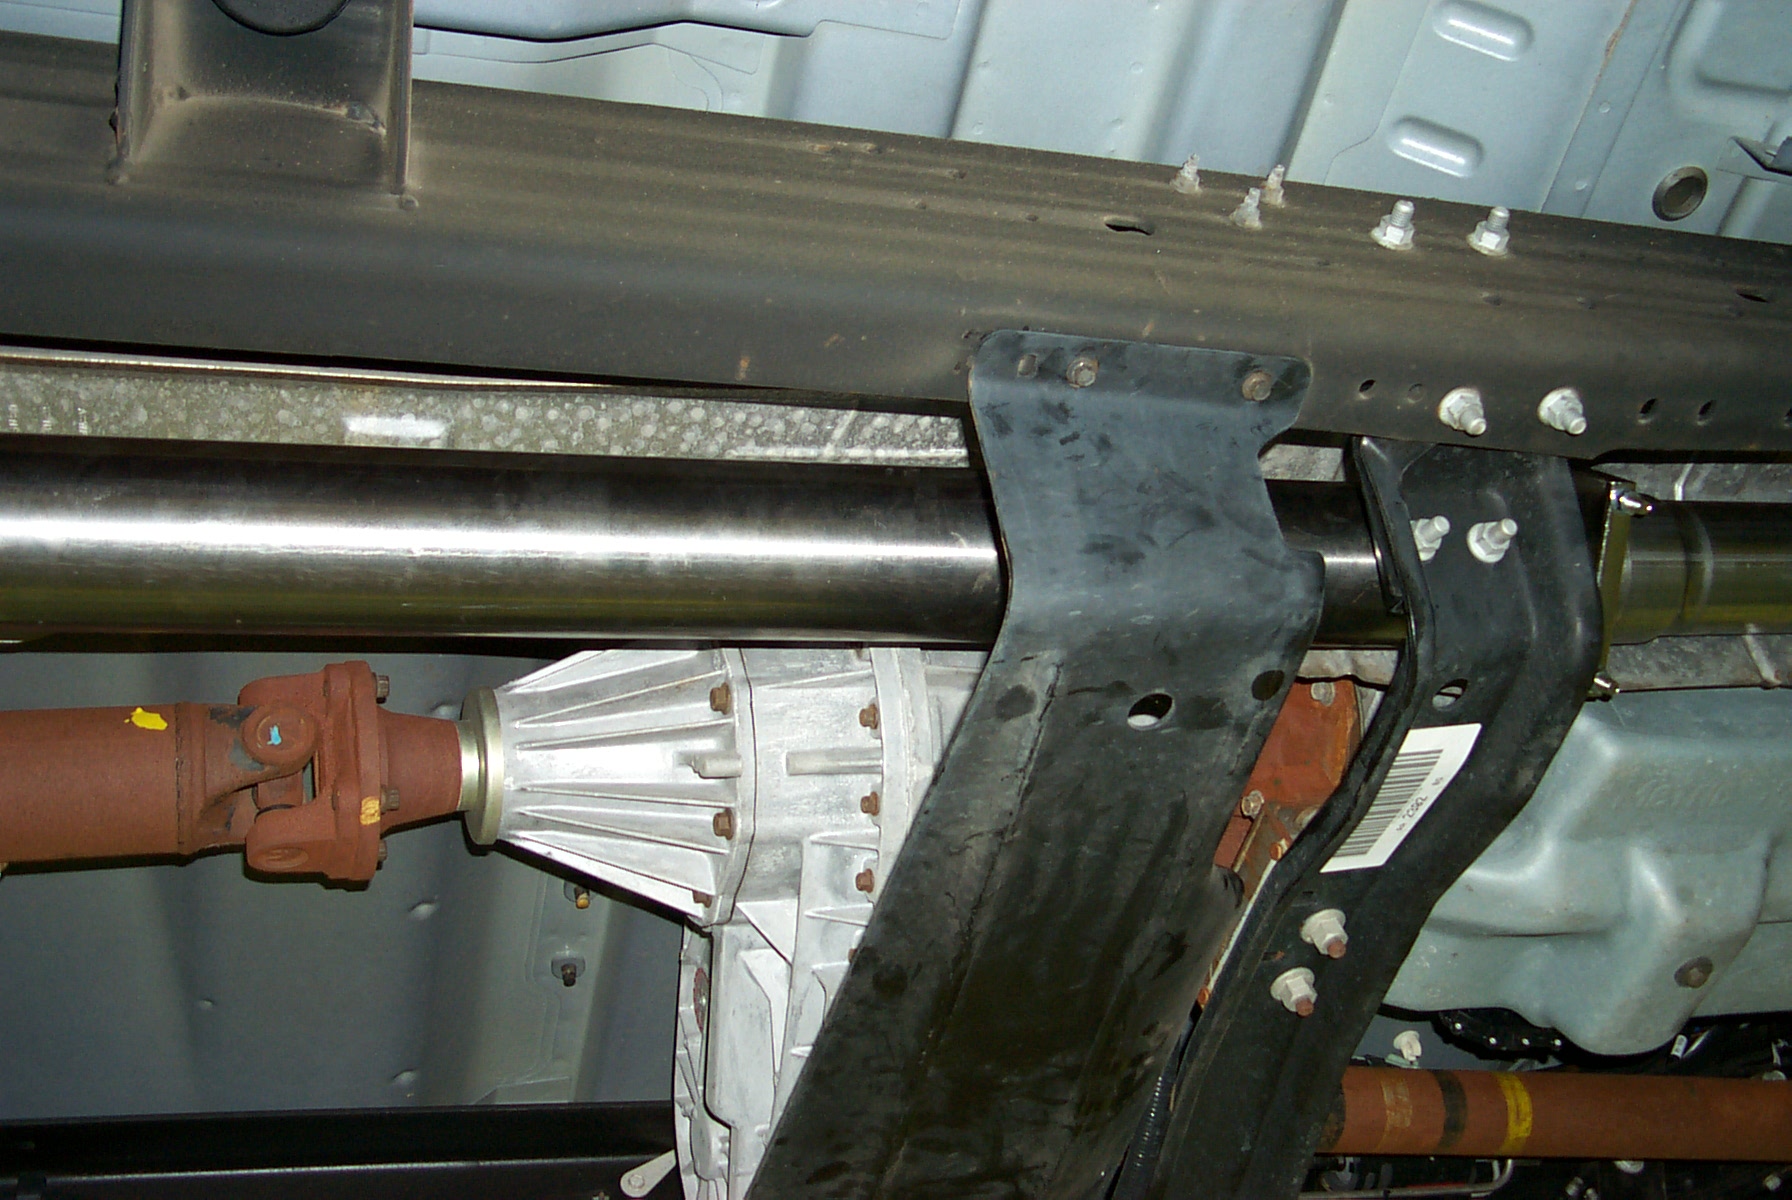
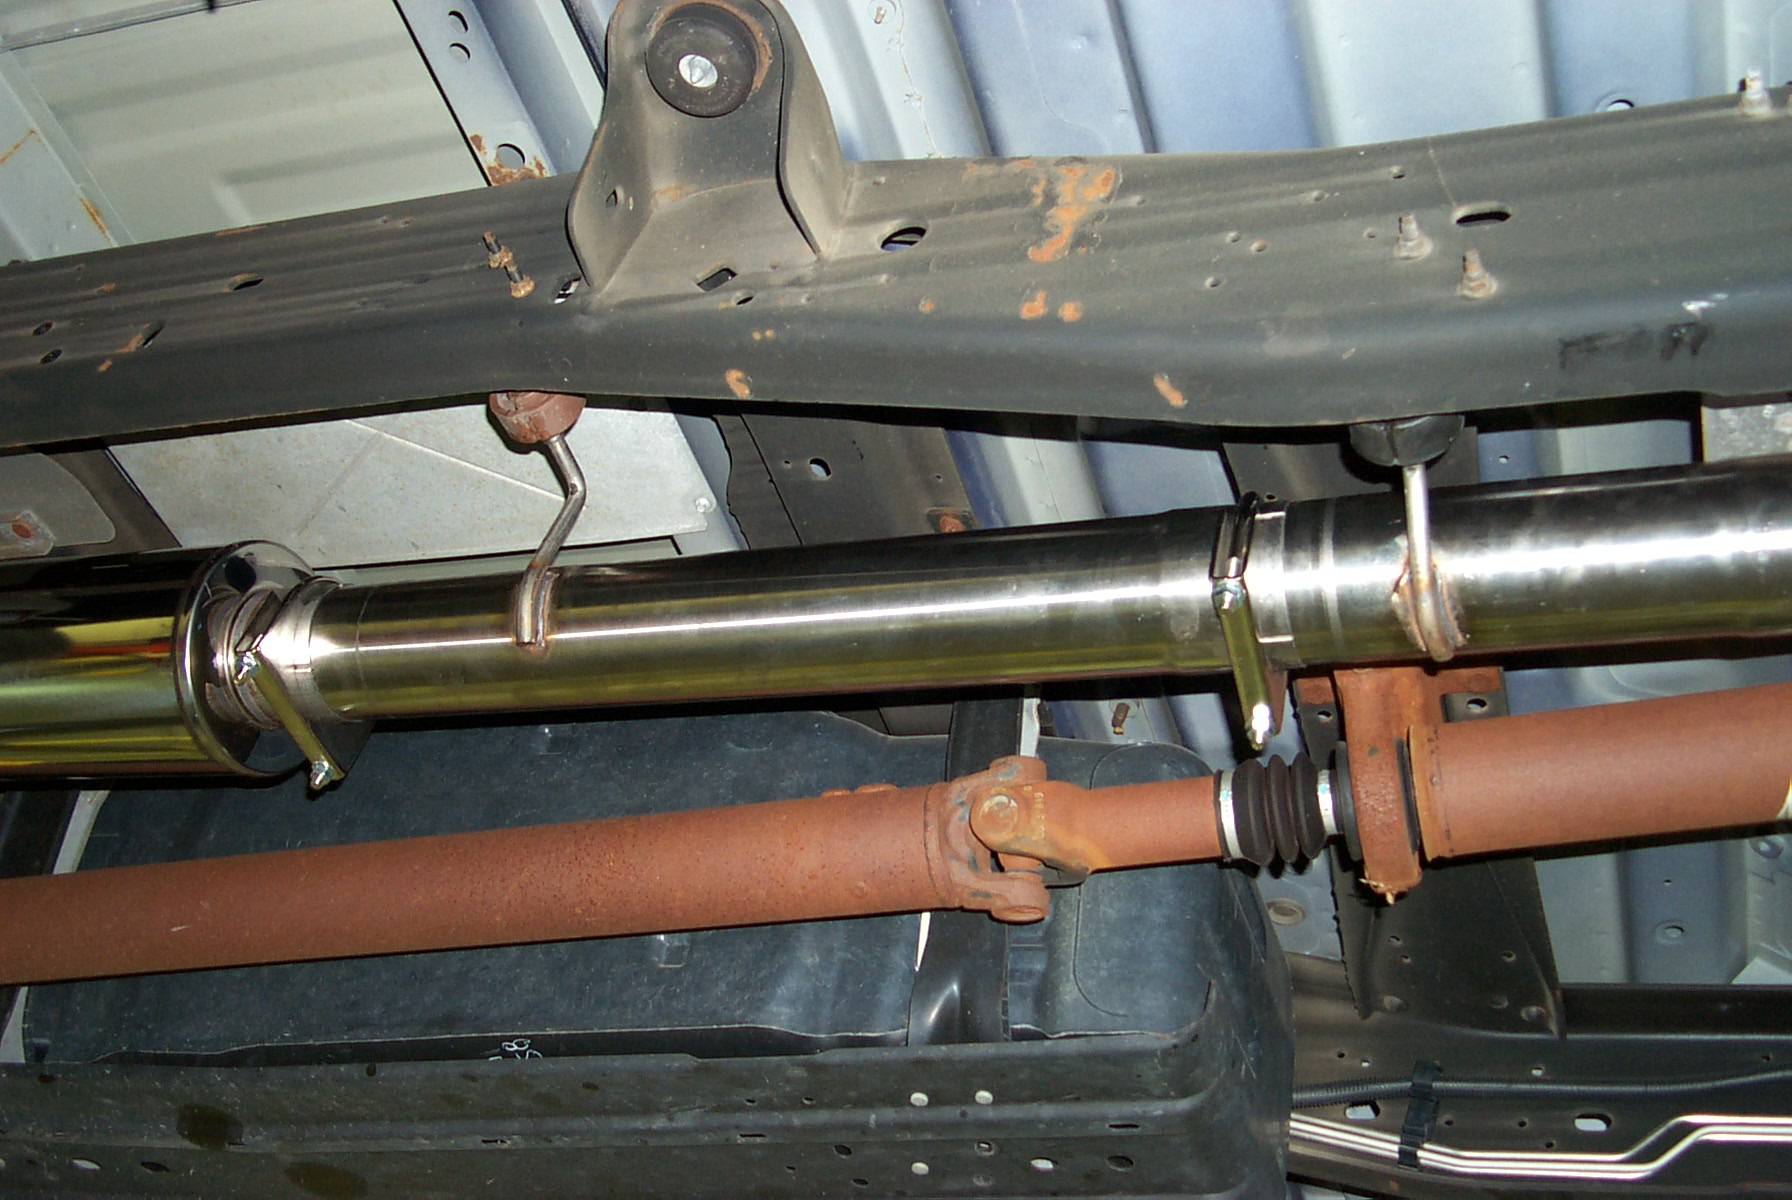
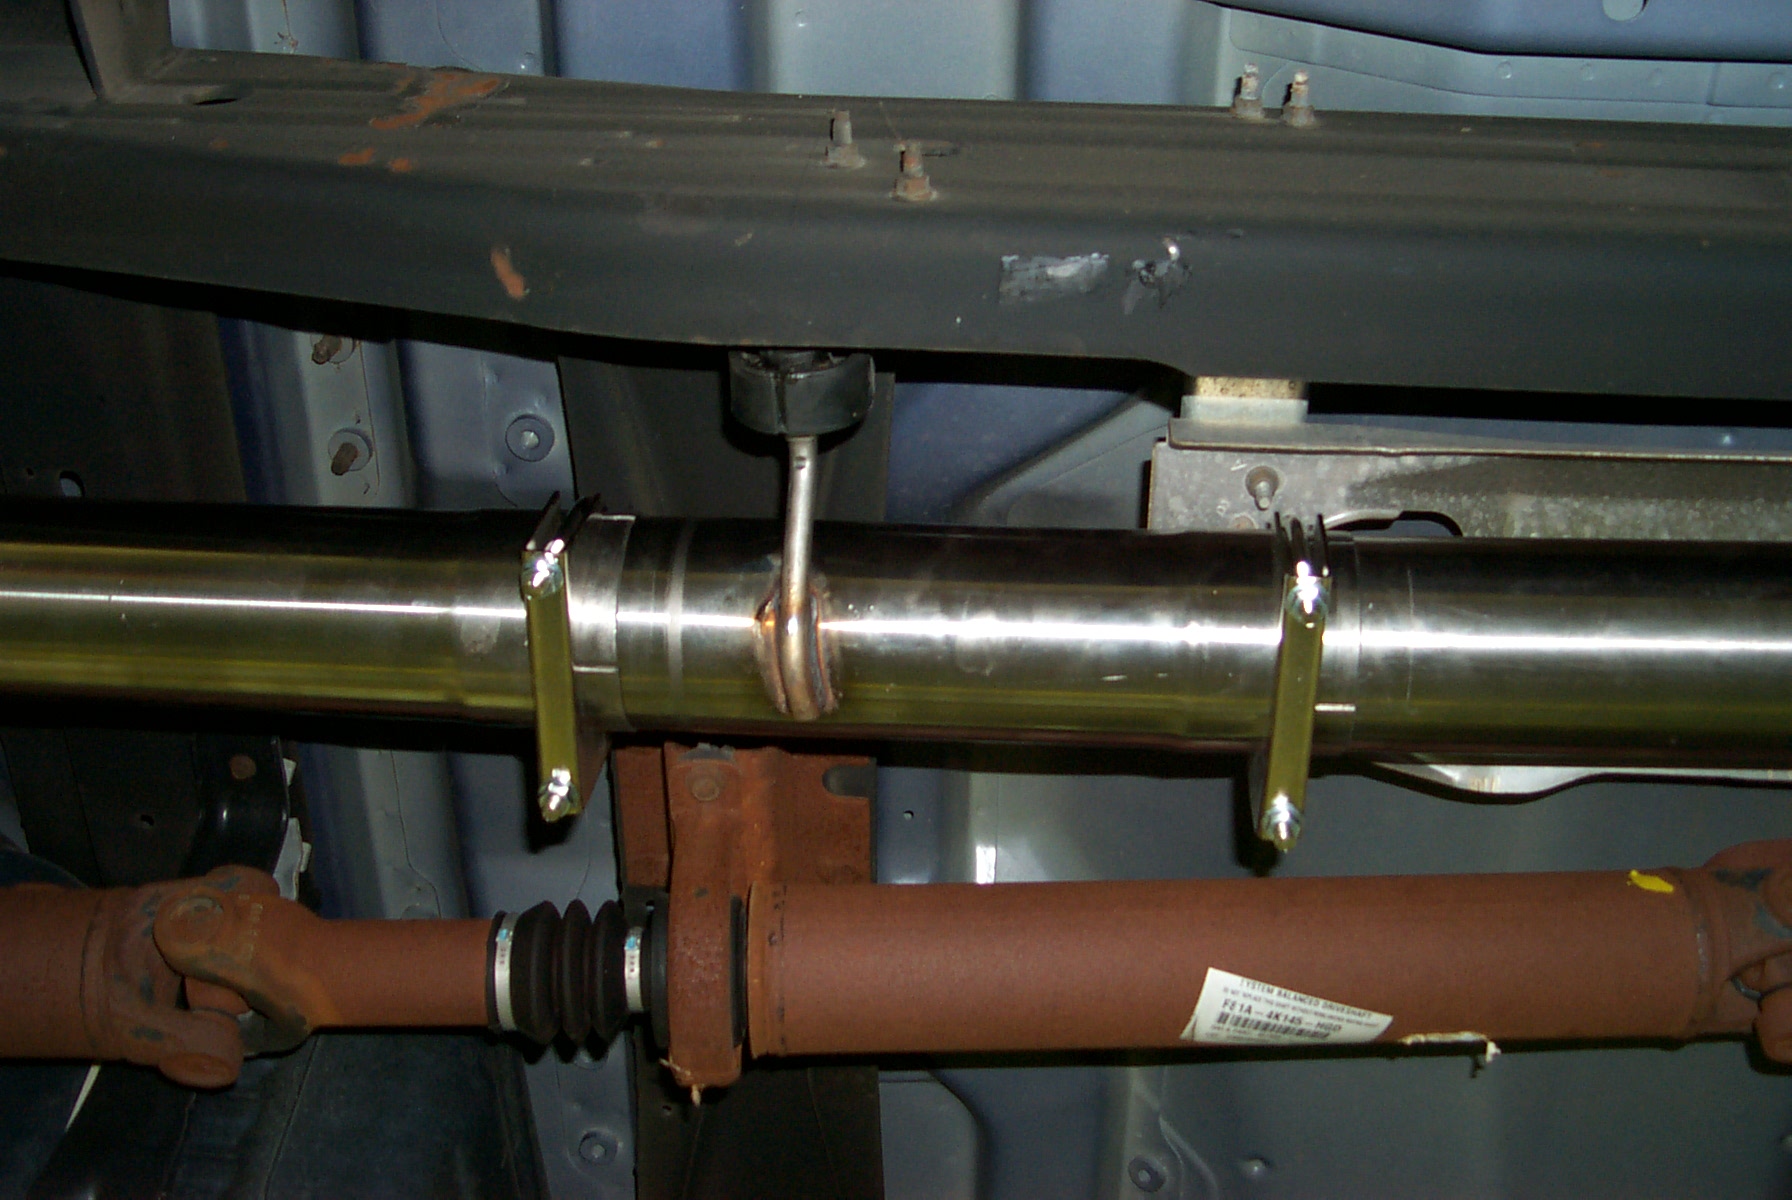
This is the last intermediate pipe. The original exhaust had one long
pipe. I had to relocate the hanger mount on the frame for this
bracket. The holes were pre-drilled in the frame. The original
location is in the top left of the picture - the they have dark black rings
around them. Notice how the hanger is longer than the hanger on the
middle intermediate pipe. This is why this pipe had to be located in
the rear - different than the instructions indicated. |
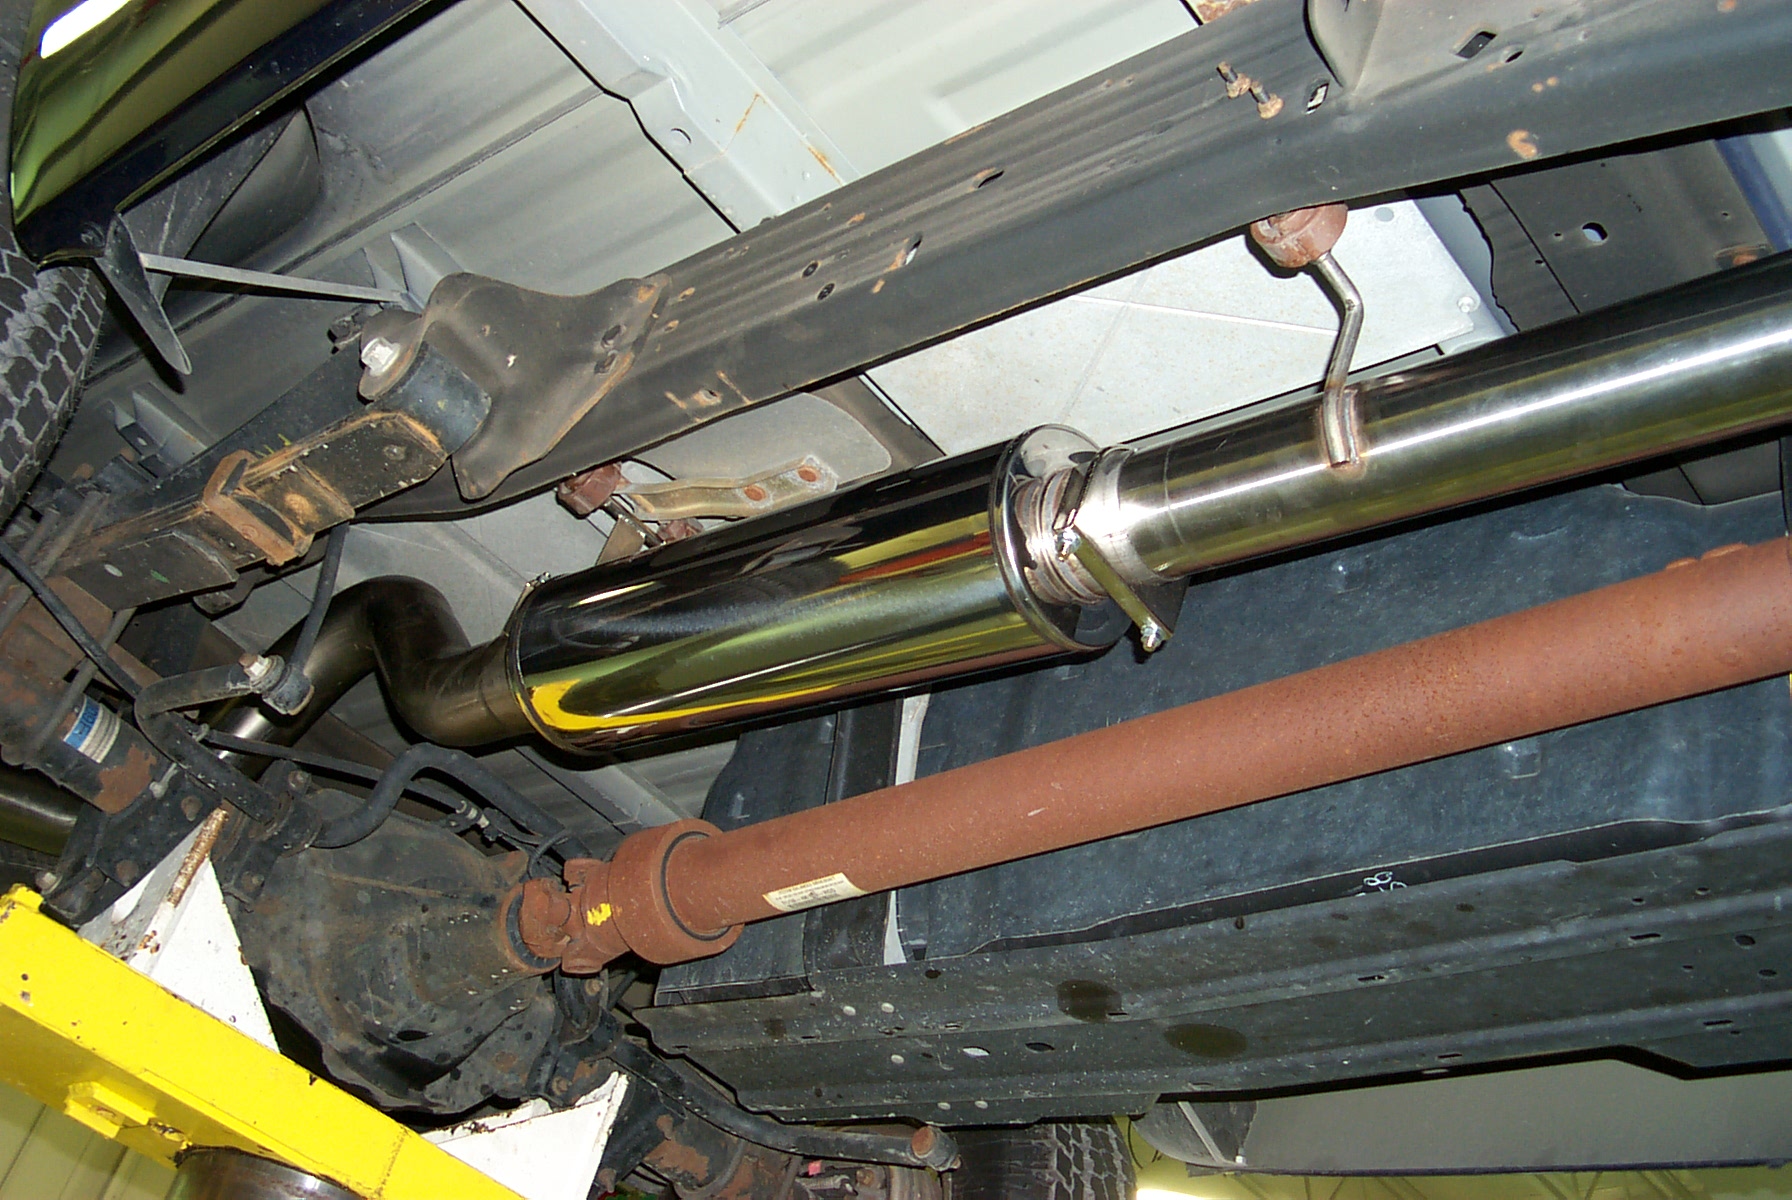
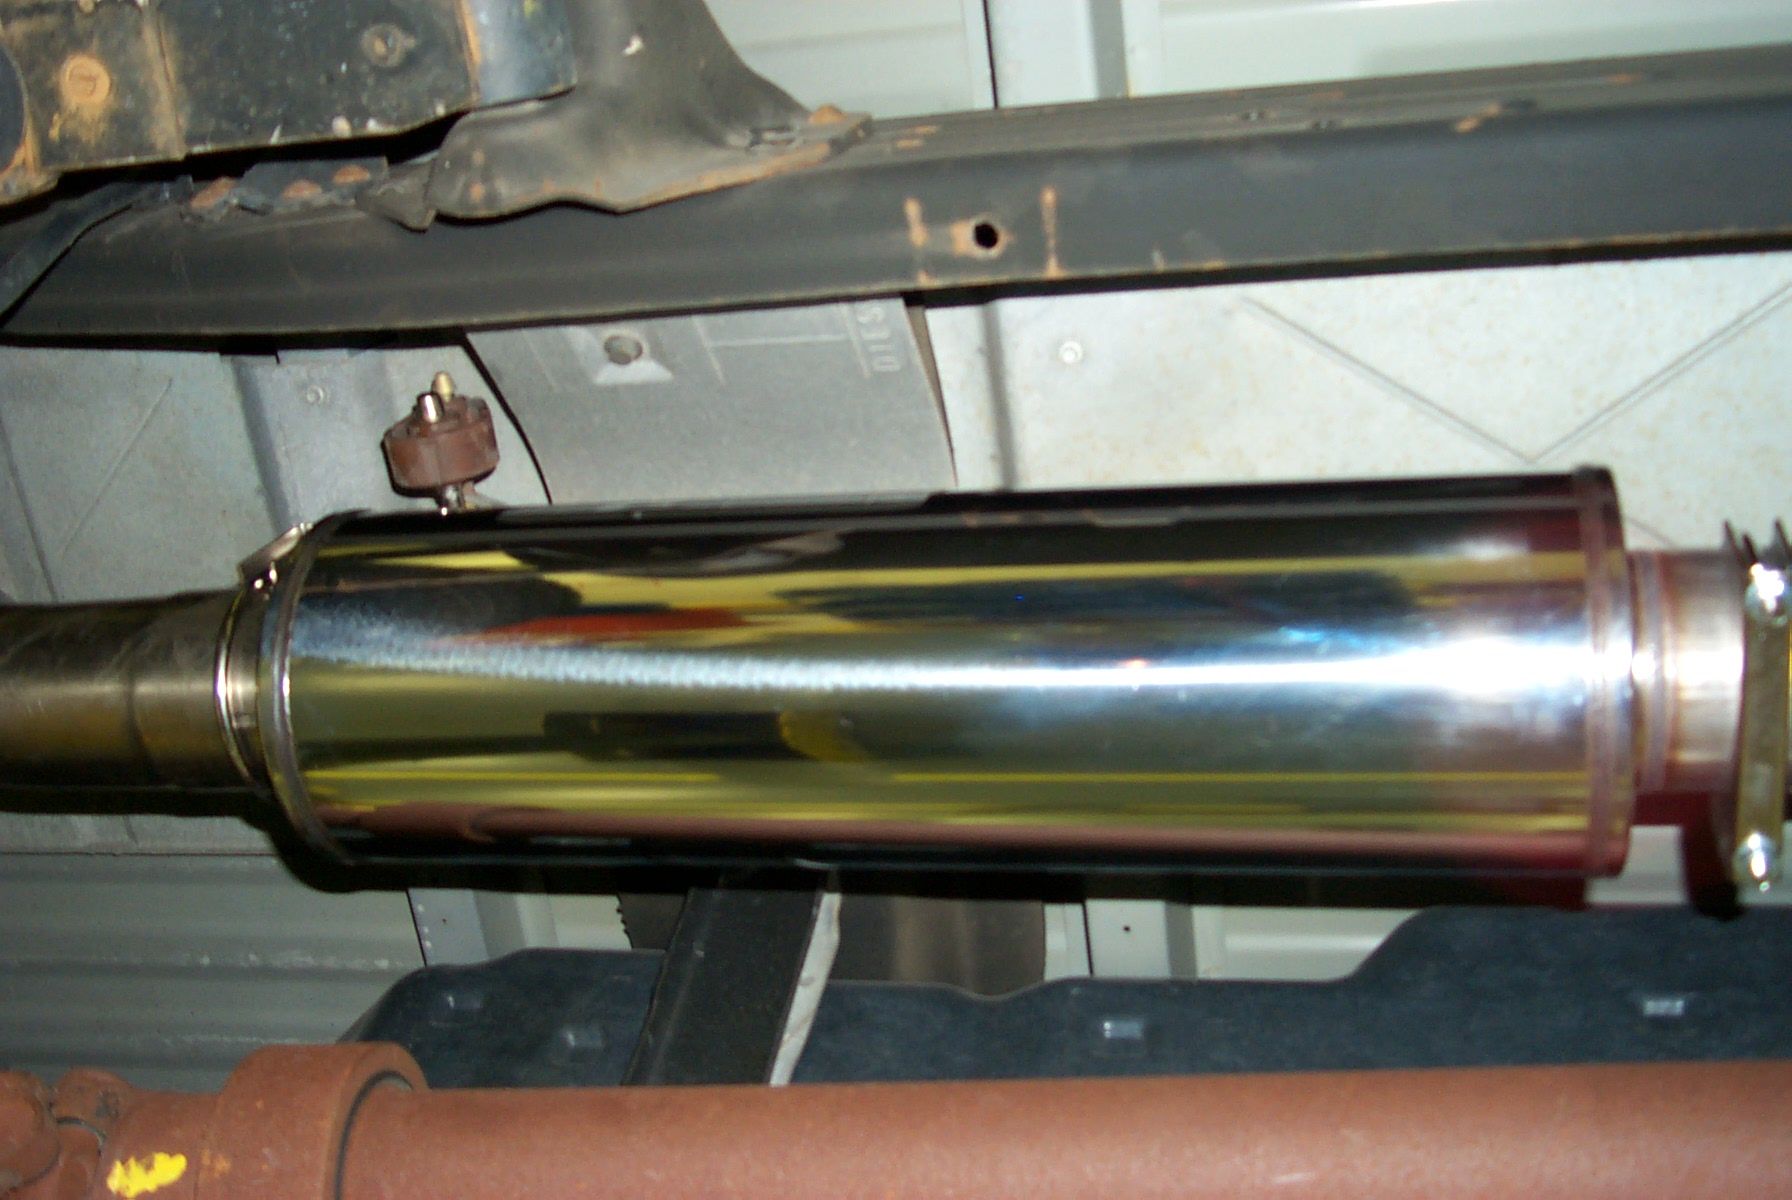
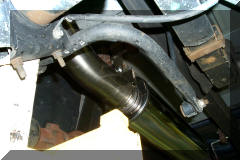
This is the nice, polished muffler/resonator. I refer to it as a
resonator because the company I work for makes the OEM exhaust (ArvinMeritor).
I am a Systems Administrator at our Technical Center in Columbus, Indiana,
and we refer to straight through items like this as a resonator.
Mufflers have baffles and chambers and actually change the exhaust flow
direction one or more times internally. |
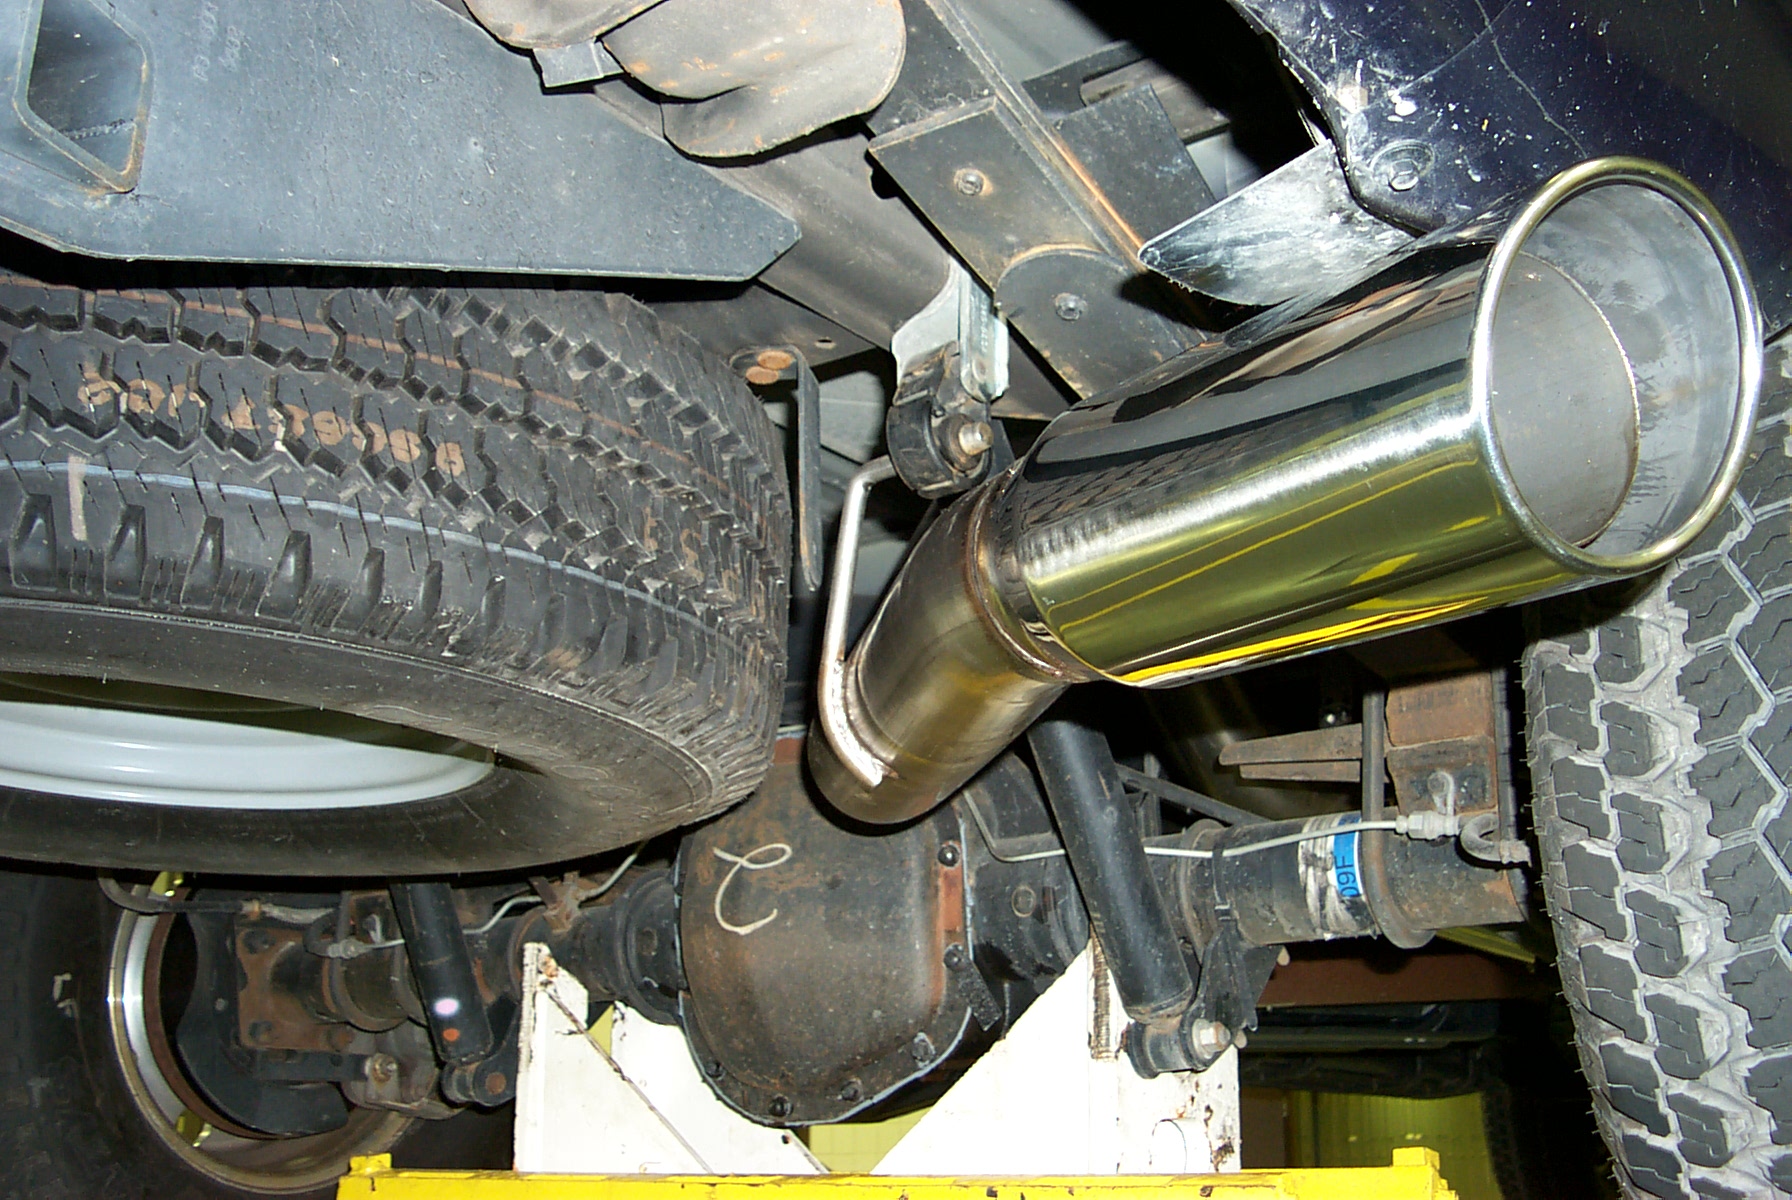
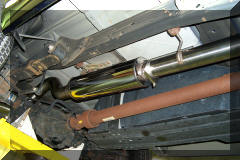
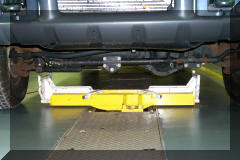
This shows the nice clearance over the rear axle.
I will note that there should be a drain hole in the bottom of the tail
stub and the bottom of the rear cap on the resonator. This is standard
practice in the OEM business to allow for condensate drainage. I will
be drilling 1/8" holes in the bottom of the tail stub
and the rear cap of the resonator. |
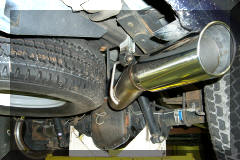
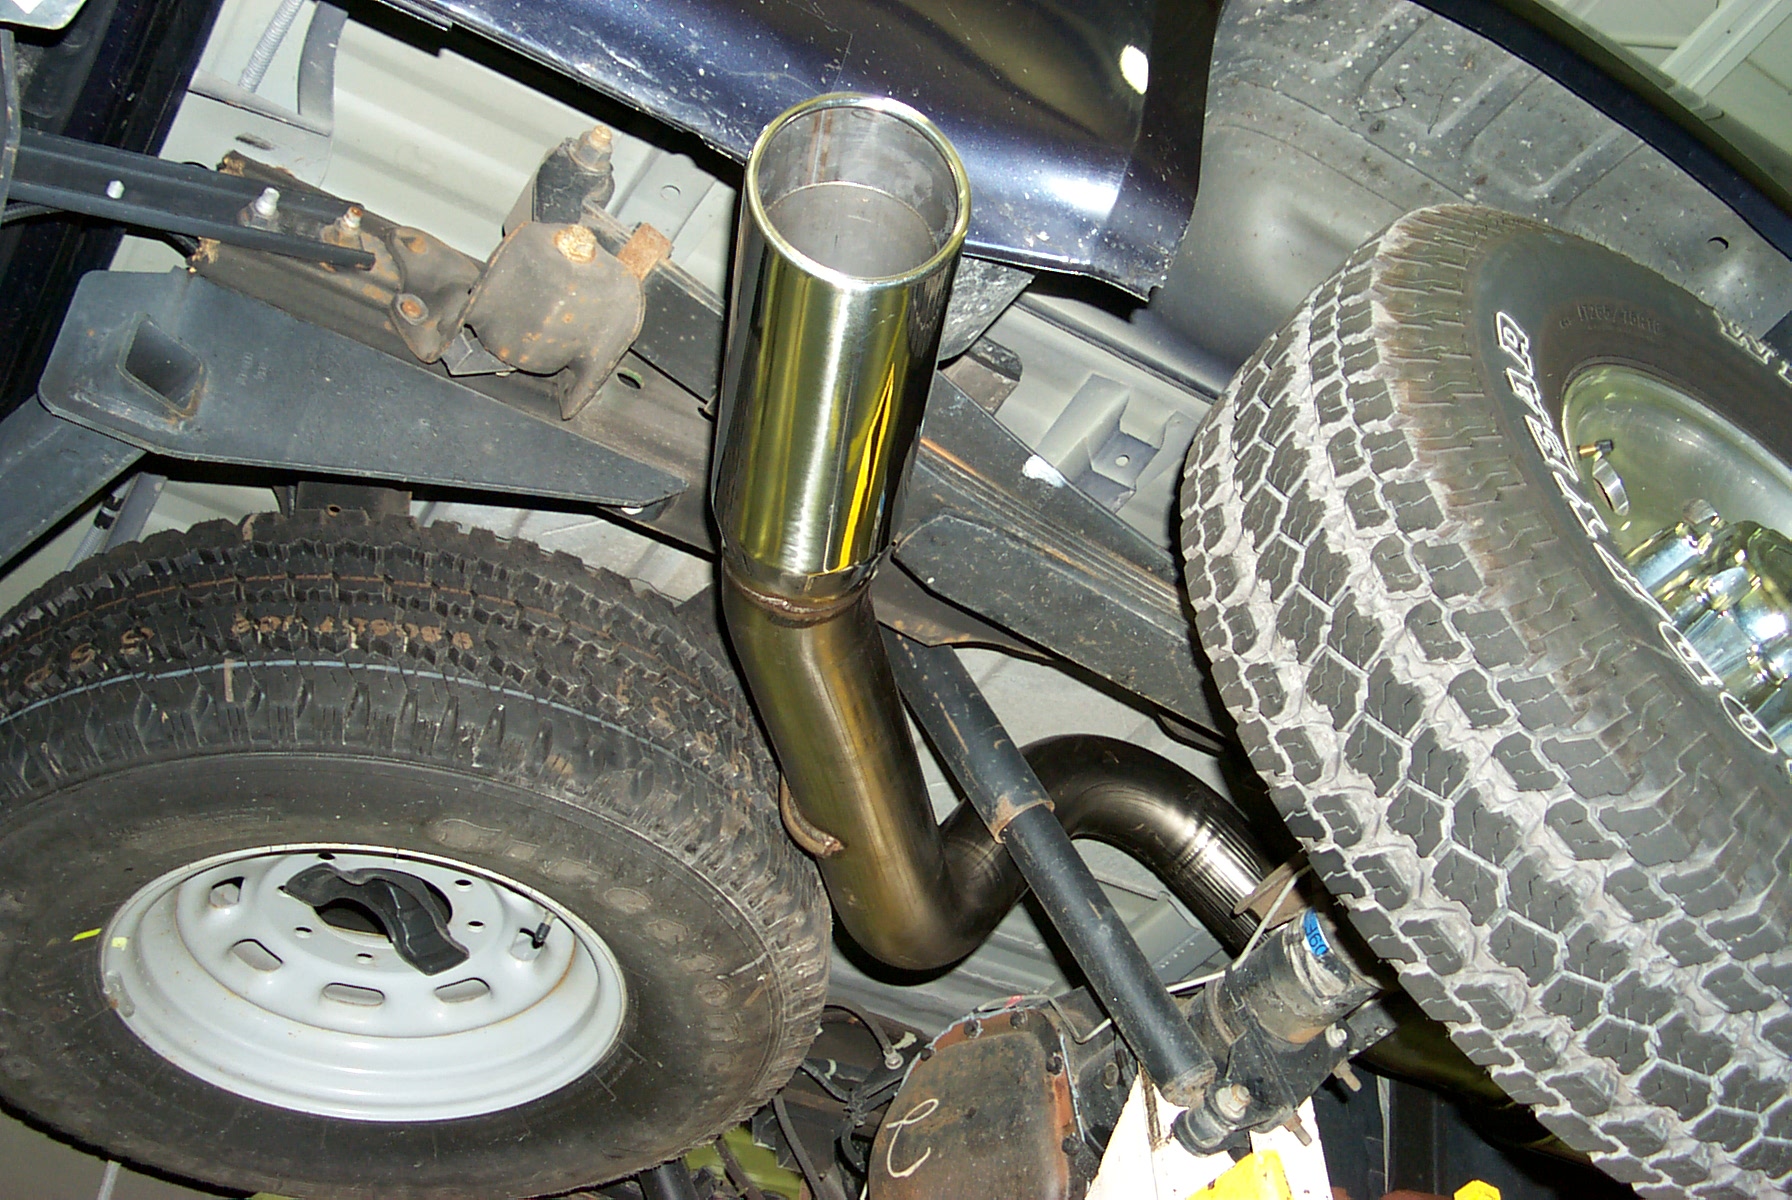
This pictures shows the clearance of the spare tire carrier. |
This pictures shows the clearance between the shock and the pipe.
There is about 1" on both sides of the pipe. |
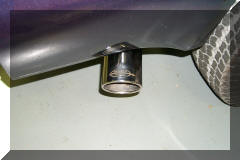
This shows the adjustable hanger for the rear of the resonator. This
allows you to adjust the tail stub height and angle. |
The next few pictures go back through the exhaust and show the hanger
angles. Also, notice you don't see the casing weld seam on the
resonator. I made sure to place it on the top side. |
I had to use an 18" long, 3/8" breaker bar to get the
clamps tight enough to prevent the pipes and resonator from rotating. |
 |
 |
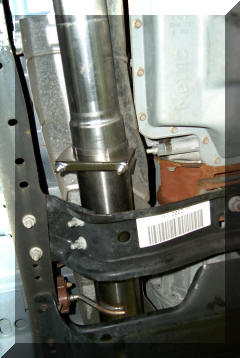 |
This shows the clearance problem I mentioned above, regarding the down pipe
and the transmission. |
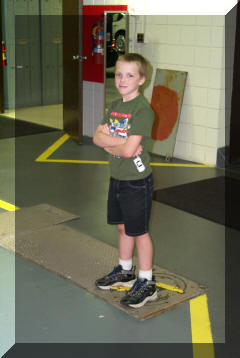
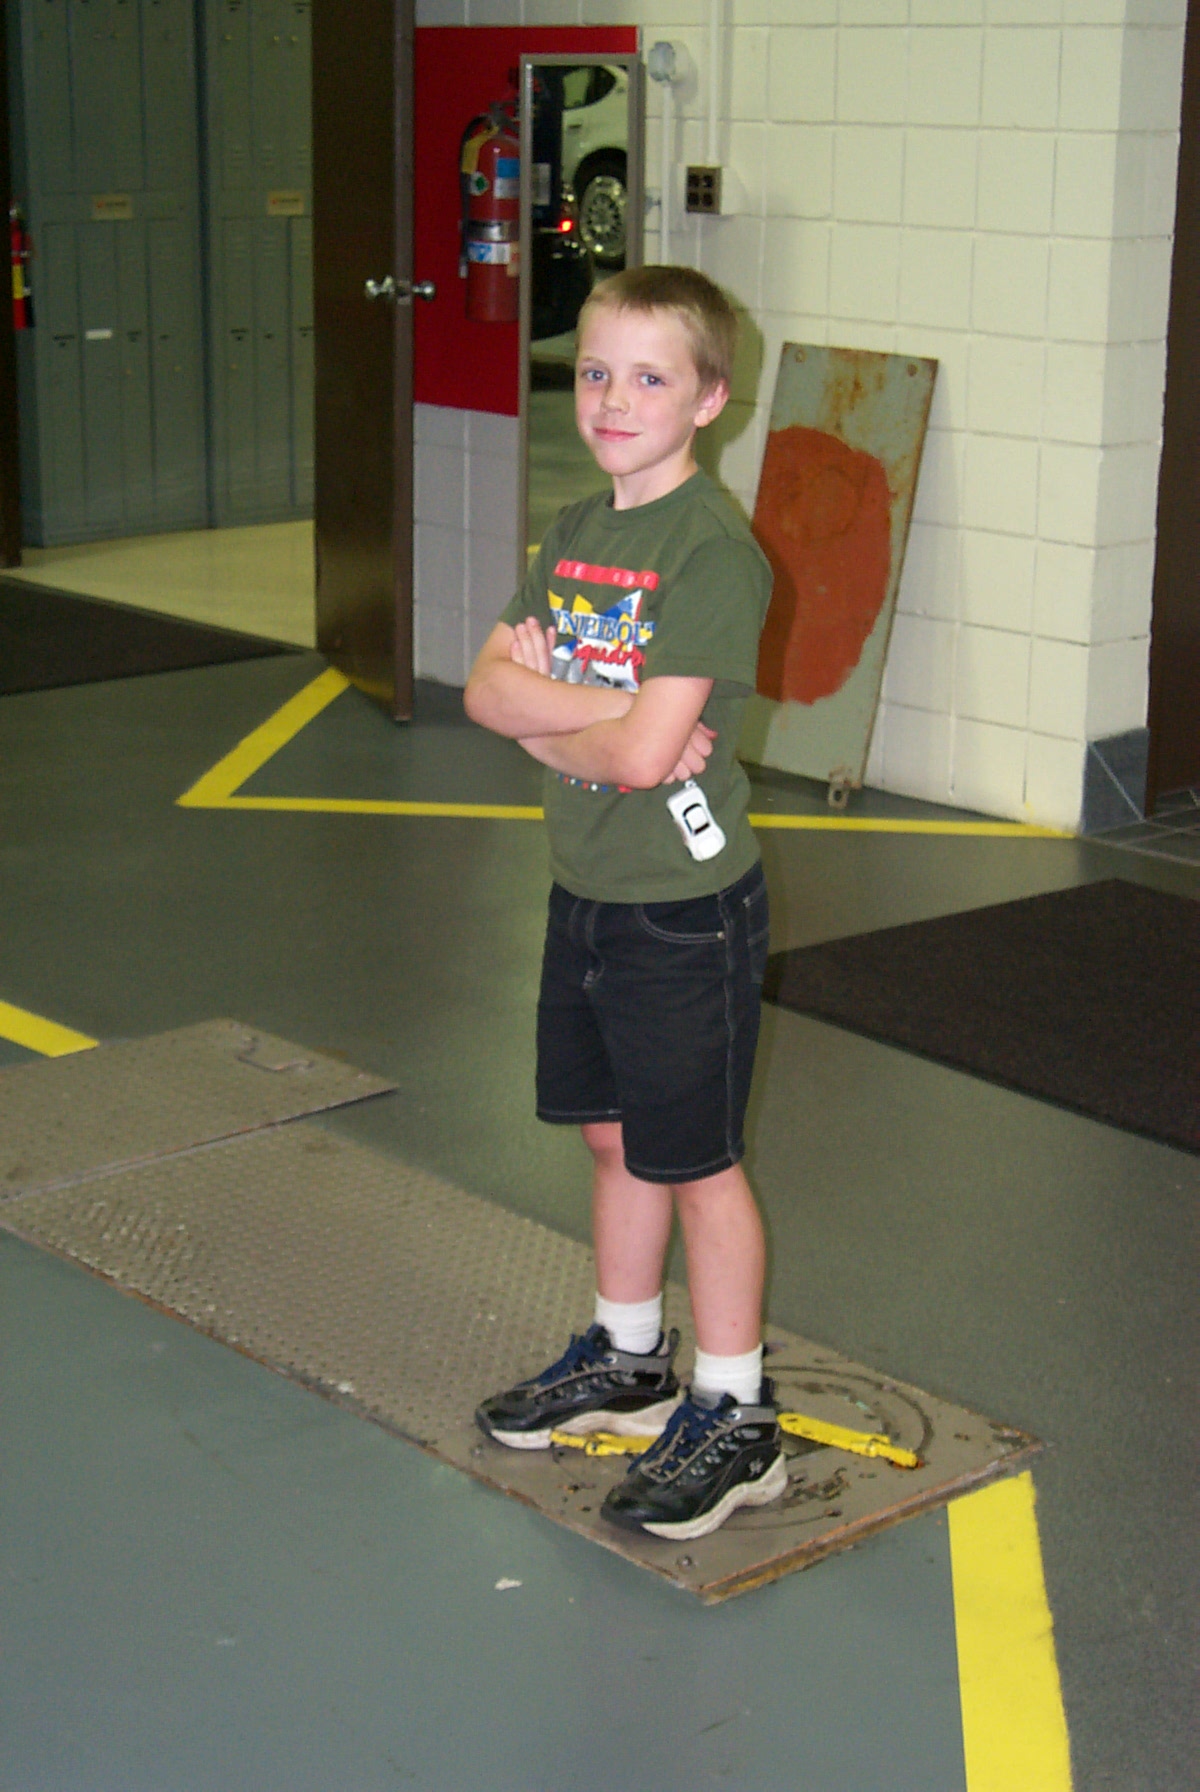
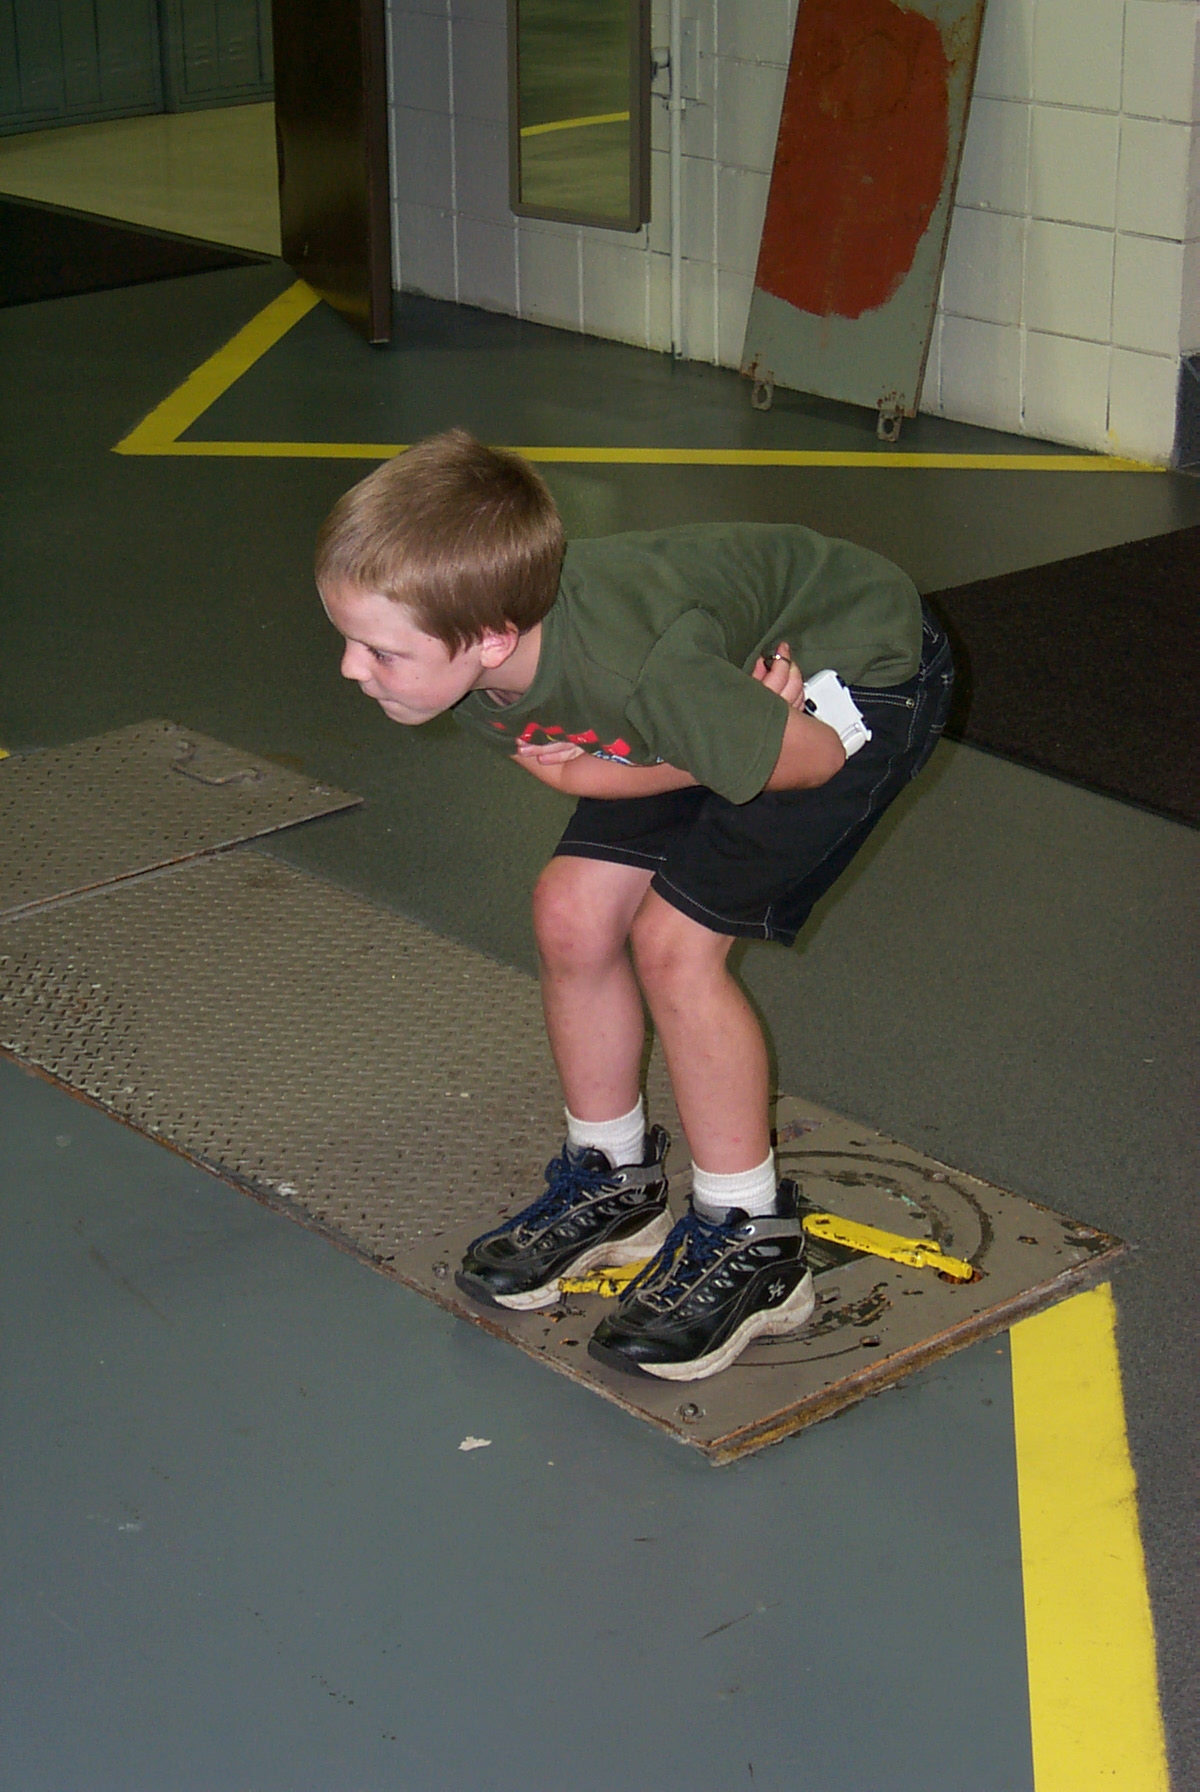
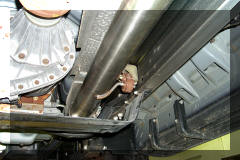
This is my son and helper, Jean-Luc. |
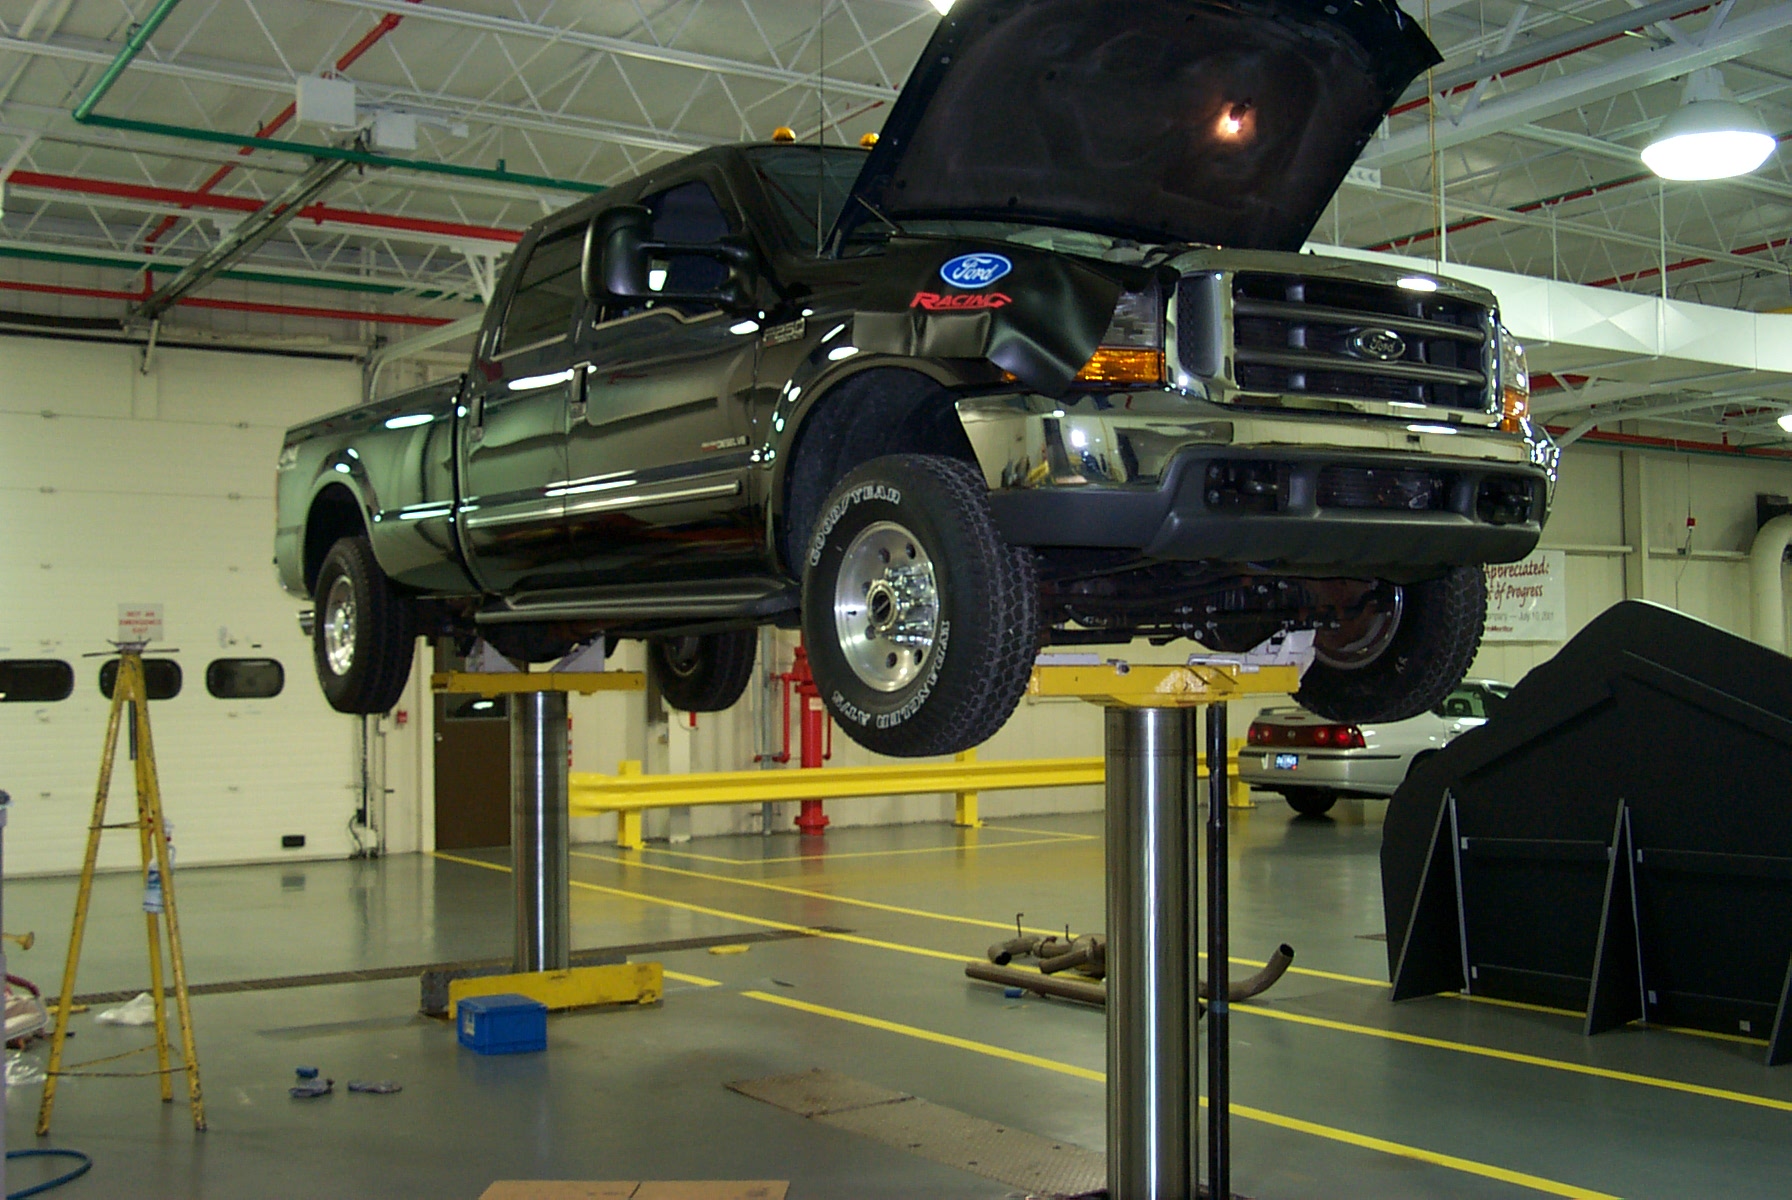
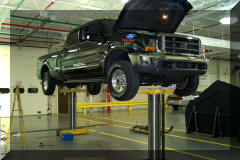
Just checking to make sure the truck comes down OK. |
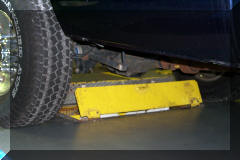
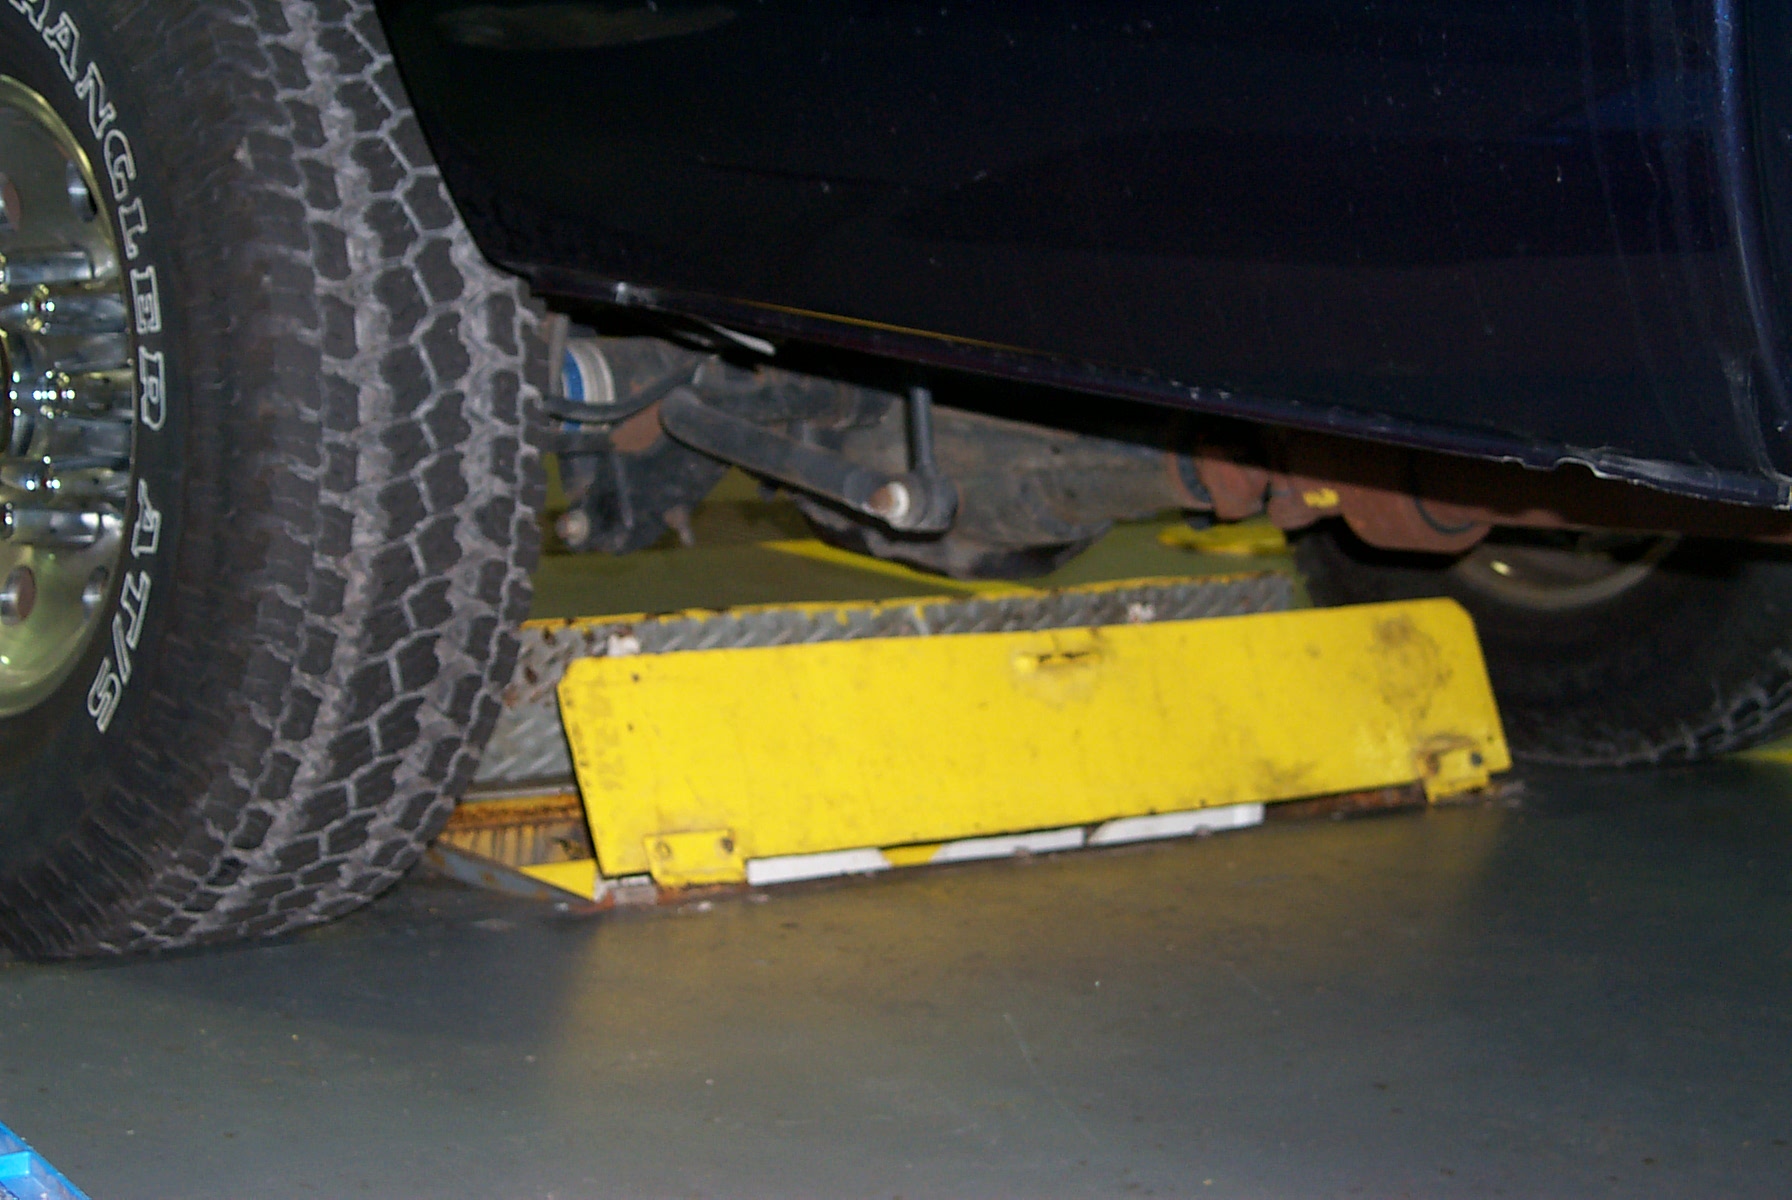
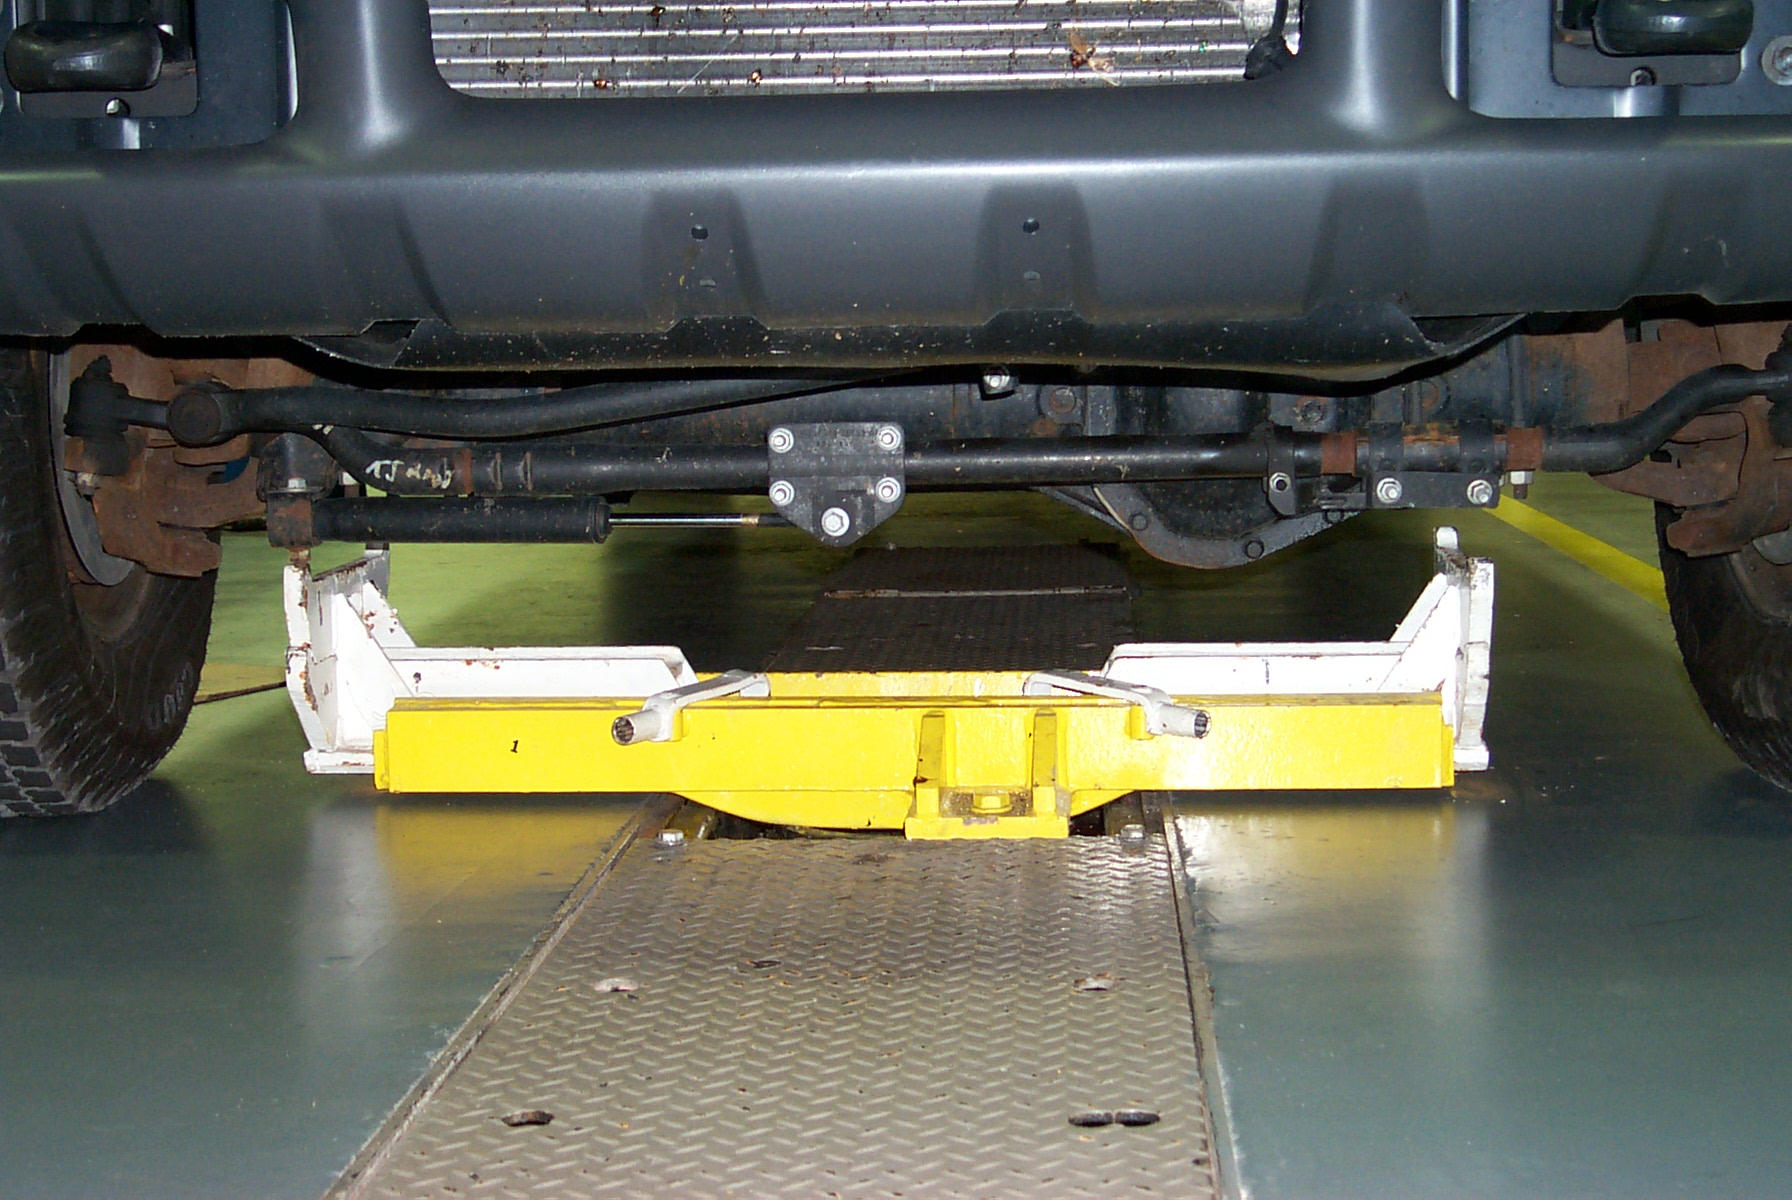
There's not a whole lot of clearance for the lift to cleanly reach the axle. |
Clearance on the front axle is even worse. |
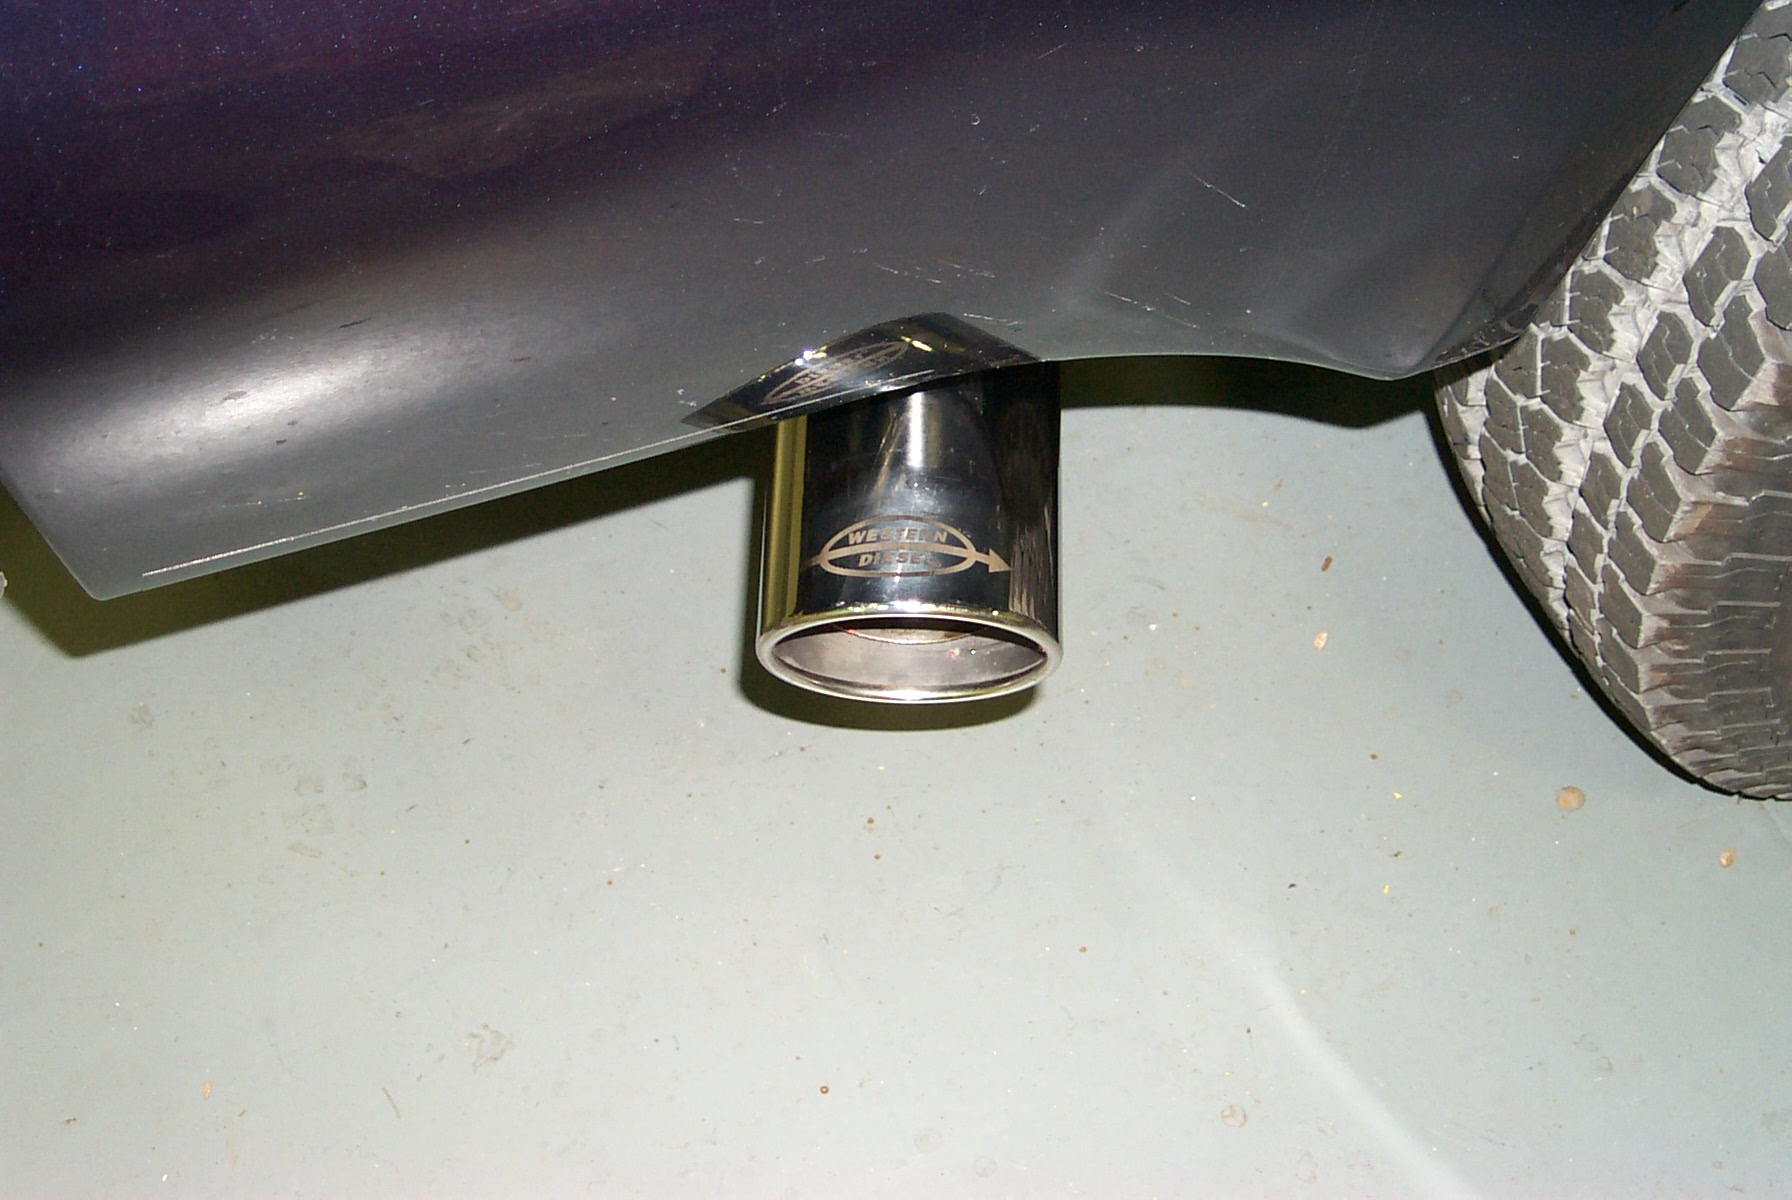
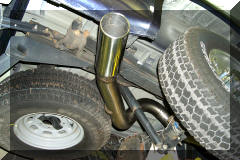
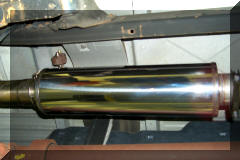
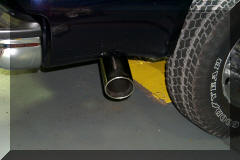
This is the nice, shiny, etched tip. |
 |
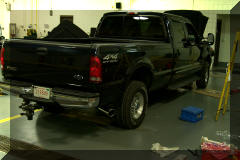
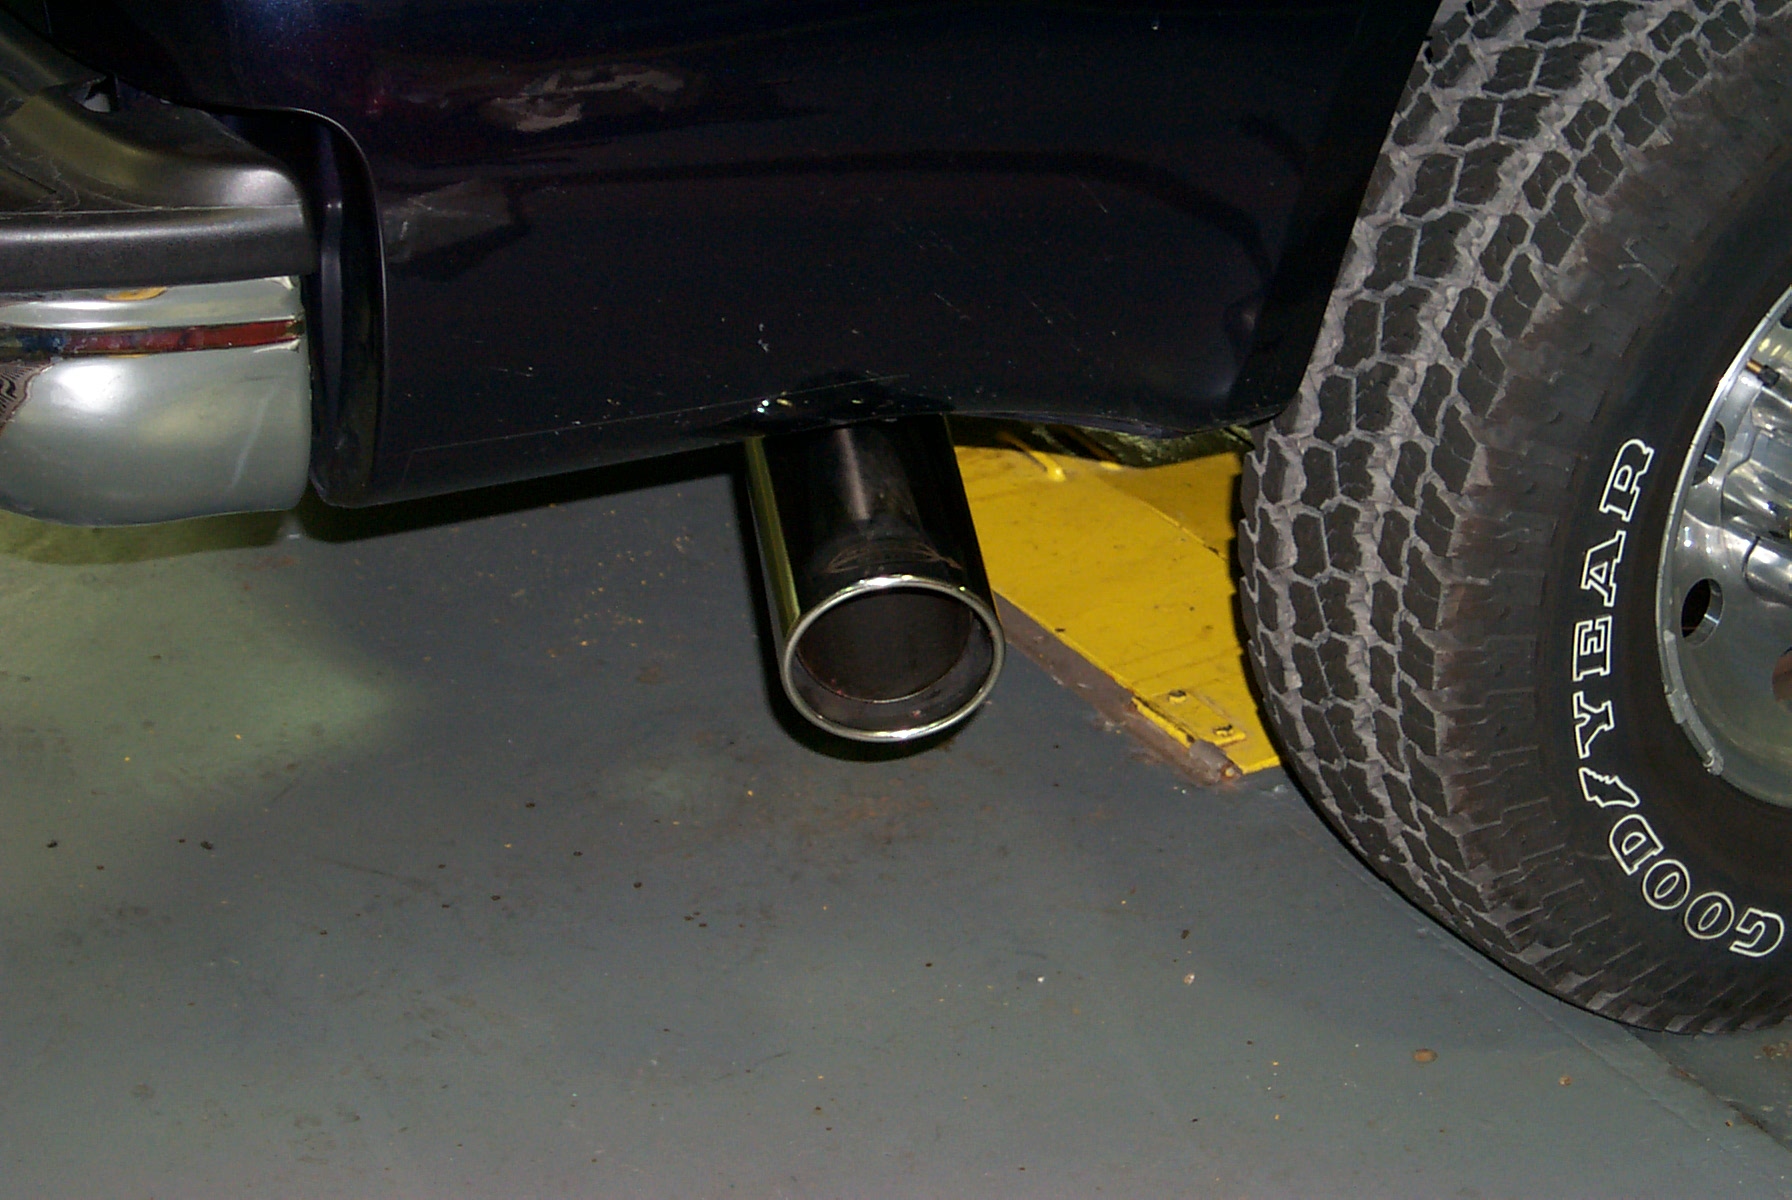
A view of the truck from the rear. |
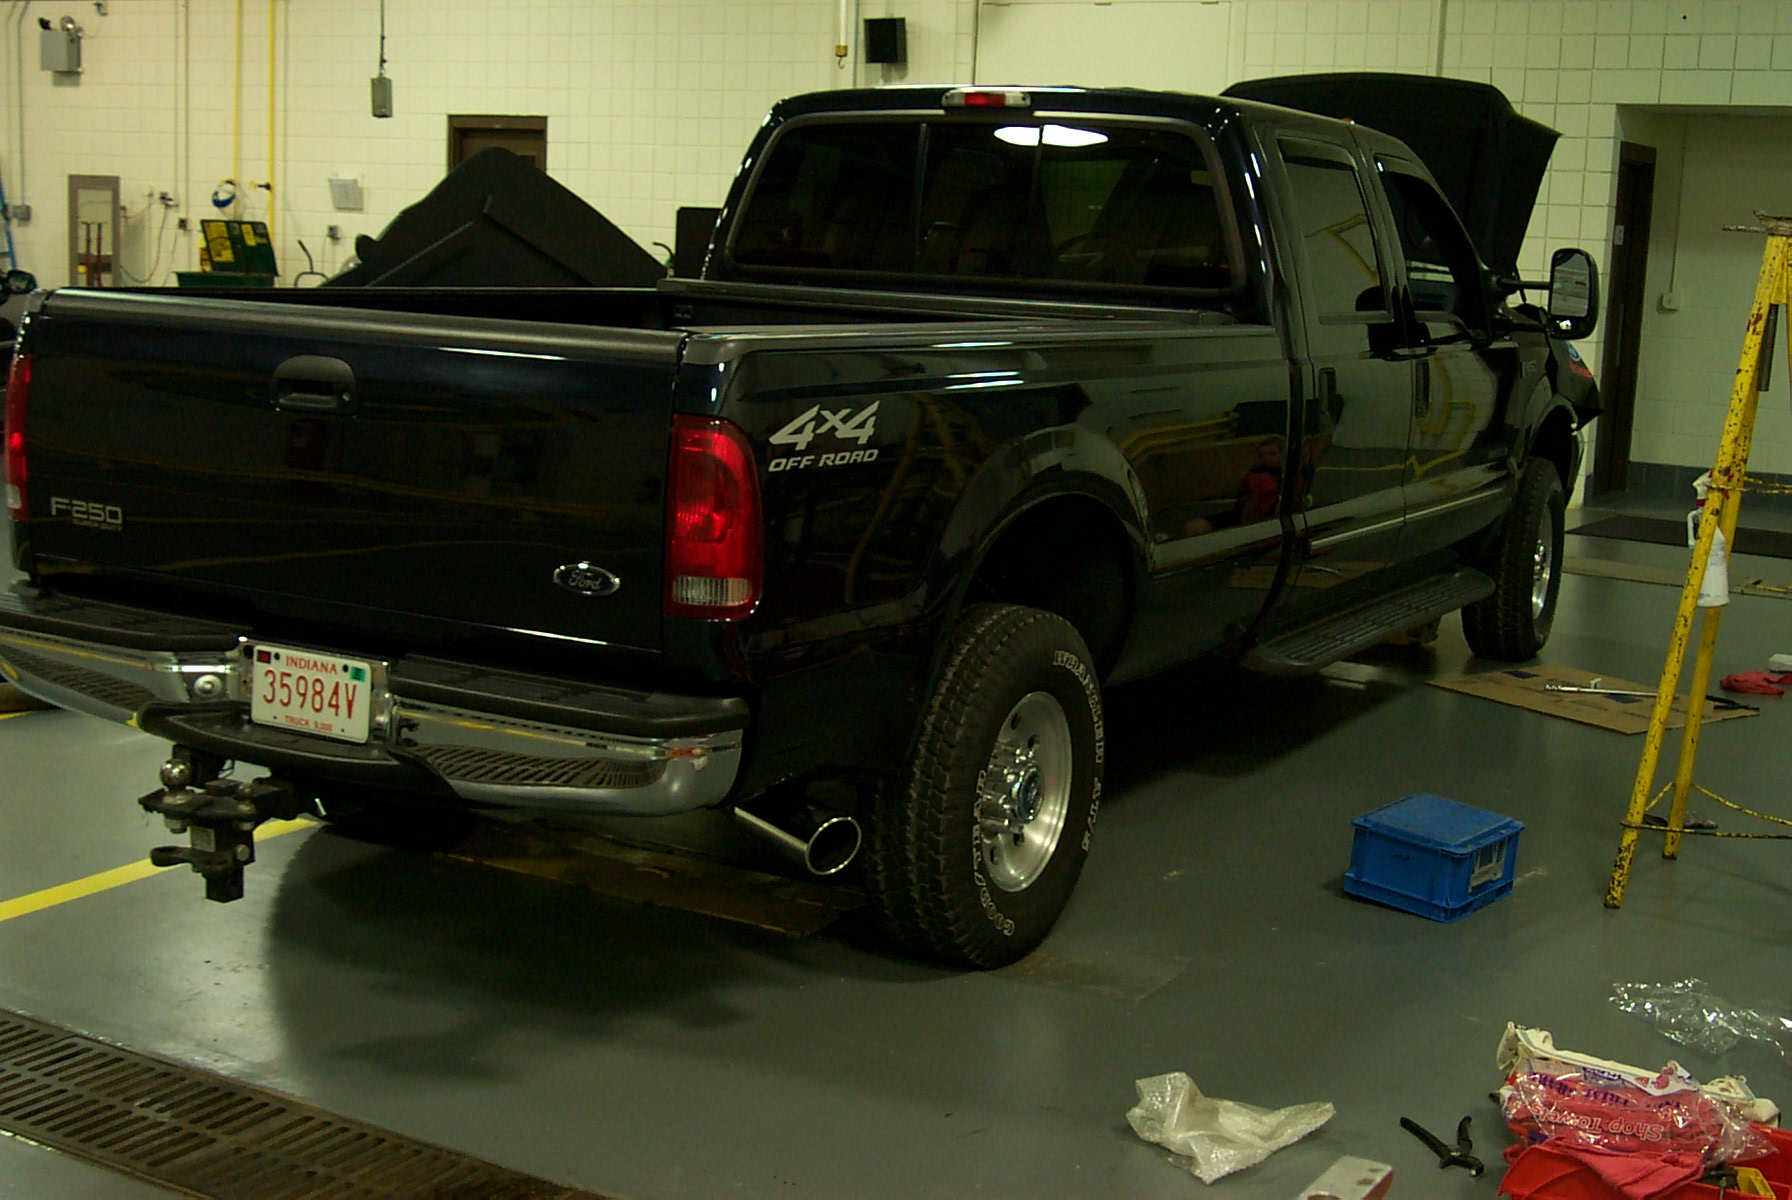
All finished and Jean-Luc is cleaning up the tools. |
|